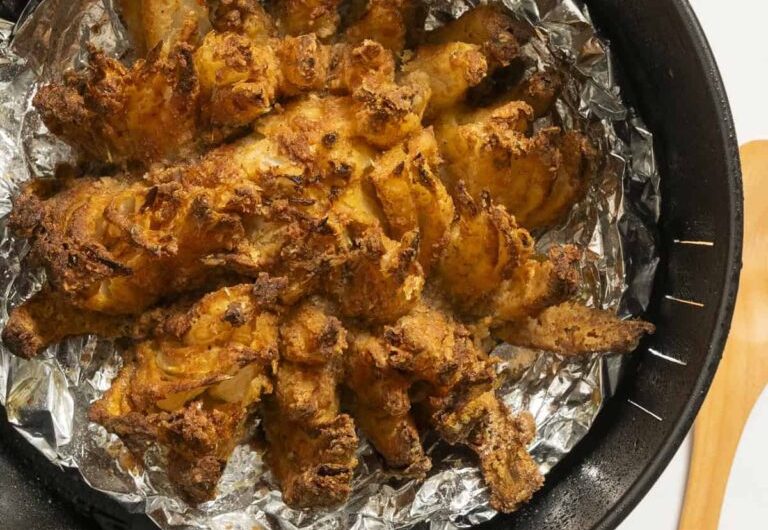

A blooming onion looks impressive when it comes out of the air fryer, but the preparation is actually quite simple once the onion is cut properly. Instead of deep-frying the whole onion in a large amount of oil, this version uses an air fryer and a light coating of oil to create crisp, golden petals.
The onion is first cut into sections so that the layers open outward like a flower. It is then coated with seasoned whole wheat flour, dipped into an egg and almond milk mixture, and coated once more. A short rest in the refrigerator helps the coating stay in place while cooking.
The finished onion has crisp edges, tender layers inside, and plenty of seasoning throughout. It works well as an appetizer, snack, or side dish and can be served as soon as it comes out of the air fryer.
Why This Blooming Onion Works
- The main difference between a good blooming onion and one that falls apart during cooking comes down to preparation. The onion needs to be cut deeply enough for the petals to separate, but not so deeply that the sections detach from the root.
- Using a large sweet onion makes the process easier because there is enough surface area to create several sections. The root keeps the onion together while the individual layers open during cooking.
- The seasoned flour provides most of the flavor. Smoked paprika adds a mild smoky note, while garlic powder gives the coating a savory taste. Dried thyme and oregano bring an herby flavor, and cayenne pepper can add some heat when desired.
- The second coating gives the onion a thicker, crunchier exterior. A light but thorough spray of olive or avocado oil helps the coating brown and crisp in the air fryer.
Preparing the Onion
- Start with a large sweet onion. Peel away the dry outer skin, but keep the onion intact.
- Place the onion on a cutting board and slice off the top portion. This creates a flat surface and makes the onion easier to handle during cutting.
- Turn the onion upside down so the cut side is facing the cutting board. The root should remain intact because it acts as the base that holds the petals together.
- Using a sharp knife, make vertical cuts from the top toward the root. Stop about 1/2 inch before reaching the root. The cuts should be spaced fairly evenly around the onion.
- Continue making additional cuts between the first ones until you have approximately 16 sections.
- The cuts do not need to look perfectly identical. What matters is that the onion is divided into enough sections for the layers to open and that the root remains attached.
- Once all the cuts are finished, carefully turn the onion over. Gently pull apart the sections with your fingers. Work slowly so the petals open without breaking away from the base.
Making the Seasoned Coating
- The dry coating combines whole wheat flour with smoked paprika, garlic powder, cayenne pepper, dried thyme, dried oregano, sea salt, and freshly ground black pepper.
- Mix everything thoroughly so the spices are evenly distributed throughout the flour.
- An even mixture is important because the flour will be used twice. If the spices are not mixed well, some parts of the onion may have much more seasoning than others.
- If using cayenne pepper, the amount listed in the recipe provides the heat level specified in the ingredients. It can be left out according to the recipe’s optional designation.
- In a separate bowl, whisk together the two eggs and unsweetened almond milk. The mixture should be smooth and evenly combined.
- Keeping the wet and dry mixtures in separate bowls makes the coating process easier and less messy.
Coating the Onion
- Place the opened onion in a bowl with the cut side facing upward.
- Spoon the seasoned flour mixture over the onion, working it gently into the spaces between the petals. Try to cover as much of the onion as possible, including the inner surfaces.
- Do not rush this step. The seasoning and flour need to reach the crevices between the sections because those areas become part of the crispy coating.
- Once the first coating has been applied, carefully turn the onion over and tap it gently to remove loose excess flour.
- Next, dip the onion into the egg and almond milk mixture. Make sure the liquid reaches the coated sections.
- Allow any excess liquid to drip away before returning the onion to the seasoned flour.
- Apply a second layer of the flour mixture, again working it gently between the petals. This second coating is what helps create a more substantial crispy exterior.
- Try to avoid pressing the petals together while coating them. Keeping the sections separated allows the coating to reach more of the onion.
Letting the Coating Set
- After the onion has been coated, place it in the refrigerator for about 10 minutes.
- This short chilling period allows the flour mixture to adhere more firmly to the onion. It also makes the coated onion easier to handle when transferring it to the air fryer.
- While the onion rests, make sure the air fryer has been preheated to 350 degrees F for at least 3 minutes.
- Preheating gives the onion a hot cooking environment from the beginning and helps the coating start crisping as soon as it enters the basket.
Preparing the Air Fryer
- Before cooking, spray the coated onion generously with olive or avocado oil from a spray bottle.
- The oil is important because the flour coating needs some moisture and fat to develop a golden, crisp texture. A spray also makes it easier to distribute the oil across the different petals without soaking the onion.
- Next, make a simple foil sling. Place the foil underneath the onion so that it can be used to lift the finished blooming onion from the basket.
- Position the onion cut side up in the air fryer basket.
- Keeping the onion upright allows the petals to spread naturally while cooking and helps the coating brown on the exposed surfaces.
Air Frying the Blooming Onion
- Cook the onion at 350 degrees F for approximately 25 minutes.
- Cooking time can vary slightly depending on the size of the onion and the particular air fryer, so keep an eye on the coating toward the end of cooking.
- The blooming onion is ready when the outside looks golden and crisp.
- During cooking, spray the onion with oil two to three times. Try to apply the spray evenly over the exposed coating.
- Avoid moving the onion around unnecessarily. The foil sling makes handling easier, but the onion can still be delicate once the coating begins to crisp.
- If the outer coating becomes golden and crunchy before the full cooking time is reached, check the onion rather than automatically continuing to cook it.
Removing the Onion
- When the blooming onion is finished, carefully lift it from the air fryer using the foil sling.
- The onion will be hot, and some of the petals may be delicate, so handle it gently.
- Transfer the onion to a serving plate. Season with additional sea salt and freshly ground black pepper according to taste.
- Serve immediately while the coating is still crisp.
What the Texture Should Be Like
- A properly cooked air fryer blooming onion should have crisp, browned coating on the outside and tender onion layers underneath.
- The outer petals generally become especially crunchy because they are more exposed to the hot circulating air. The inner sections remain softer while still picking up the seasoned coating.
- The key is to avoid overcrowding or covering the onion in a way that prevents the hot air from circulating around it.
- Because every air fryer is slightly different, the visual appearance of the onion is a useful guide. Look for a golden exterior and crisp-looking petals rather than relying only on the clock.
Serving the Blooming Onion
- This onion is best served immediately after cooking.
- It can be placed in the center of a serving plate and enjoyed by pulling individual petals away from the base. The separated pieces are easy to pick up and work well as an appetizer.
- A favorite dipping sauce can be served alongside it. The crisp seasoned coating pairs naturally with creamy, tangy, or mildly spicy dips.
- For a larger spread, the blooming onion can be served with other appetizers or alongside a meal as a shareable side.
Storage and Reheating
- For the best texture, serve the blooming onion immediately after air frying.
- If there are leftovers, they can be stored in an airtight container in the refrigerator for about 5 days. However, the coating will gradually lose its crispness during storage.
- The onion is at its best shortly after cooking, when the outside is freshly browned and crunchy.
- If leftovers are refrigerated, reheating in an air fryer can help restore some of the crisp texture. Avoid expecting the onion to have exactly the same texture as when freshly cooked.
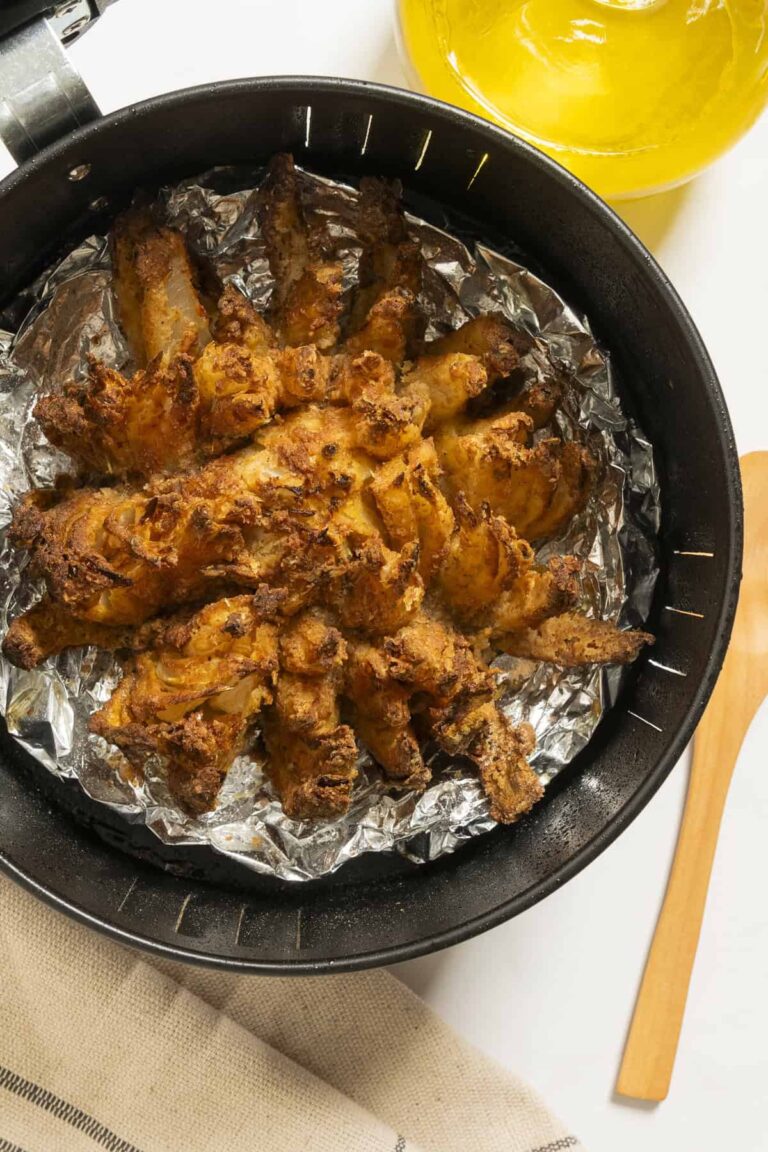
Air Fryer Blooming Onion
A crispy air fryer blooming onion made with a seasoned whole wheat flour coating, egg and almond milk mixture, and a light spray of olive or avocado oil. The onion is cut into petals, coated twice, chilled briefly, and air-fried until golden and crisp.
6
servings30
minutes25
minutes108
kcalIngredients
1 large sweet onion
1 cup whole wheat flour
1 tablespoon smoked paprika
1 teaspoon garlic powder
1/2 teaspoon cayenne pepper, optional, for heat
1/2 teaspoon dried thyme
1/2 teaspoon dried oregano
2 large eggs
1 cup unsweetened almond milk
Olive or avocado oil in a spray
Sea salt and freshly ground black pepper to taste
Directions
- Preheat the air fryer to 350 degrees F for at least 3 minutes.
- Slice off the top of the onion to create a flat surface. Peel away the outer skin.
- Turn the onion cut-side down. Make several evenly spaced vertical cuts, starting about 1/2 inch from the root. Continue cutting between the sections until you have about 16 sections.
- Turn the onion over and gently separate the petals without breaking them away from the root.
- In a bowl, combine the whole wheat flour, smoked paprika, garlic powder, cayenne pepper, dried thyme, dried oregano, sea salt, and freshly ground black pepper.
- In a separate bowl, whisk together the eggs and unsweetened almond milk.
- Place the onion in a bowl with the cut side facing up. Spoon the seasoned flour mixture over the onion, working it between the petals so the sections are well covered.
- Turn the onion over and gently tap off any excess flour.
- Dip the onion into the egg and almond milk mixture, allowing excess liquid to drain away.
- Return the onion to the seasoned flour mixture and coat it again for a second layer.
- Place the coated onion in the refrigerator for 10 minutes to allow the coating to set.
- Spray the onion generously with olive or avocado oil.
- Make a foil sling and use it to place the onion cut-side up in the air fryer basket.
- Air fry for approximately 25 minutes, or until the coating is golden and crisp.
- Spray the onion with oil 2 to 3 times during cooking for a crispier coating.
- Carefully remove the onion using the foil sling.
- Season with sea salt and freshly ground black pepper and serve immediately.
Notes
- Keep the root intact when cutting the onion so the petals stay connected.
- Use a sharp knife for cleaner, more controlled cuts.
- Work the flour mixture between the petals for better coverage.
- The onion is best served immediately while the coating is crisp.
- If stored, keep it in an airtight container in the refrigerator for up to about 5 days, although the coating will lose some of its crispness.
Nutrition Facts
- Serving Size: 6 g
- Calories: 108kcal
- Fat: 3g
- Saturated Fat: 1g
- Sodium: 77mg
- Carbohydrates: 18g
- Fiber: 3g
- Sugar: 1g
- Protein: 5g
