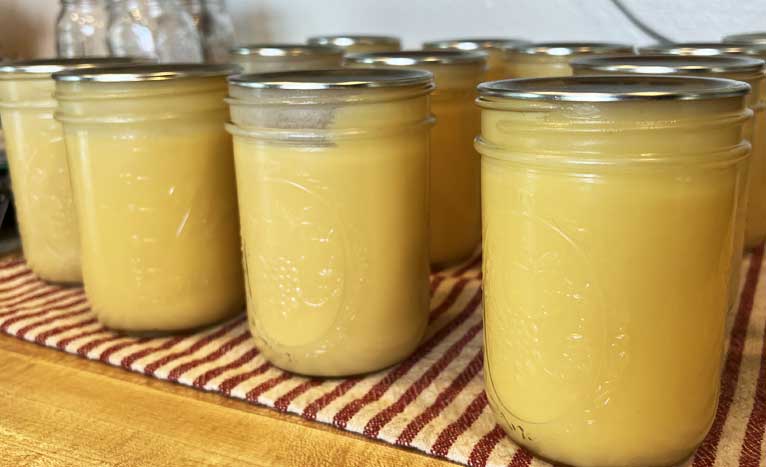
Making homemade butter is easier than you might think, and it’s a delightful way to create fresh, creamy butter right in your kitchen. With just a few ingredients and some simple steps, you can enjoy the pure flavor of freshly churned butter without any preservatives. This method is especially fun for those who enjoy DIY kitchen projects or want to involve kids in cooking. Let’s dive into this step-by-step guide to making butter in a mason jar.
What You Need to Make Fresh Butter at Home
Here are the simple ingredients and tools required:
- Heavy Cream: This is the star of the show. Choose high-quality heavy cream for the best results.
- Salt: A pinch of salt enhances the flavor. Opt for sea salt or kosher salt for a richer taste.
- Mason Jar with Lid: A sturdy mason jar is essential for this recipe. Ensure it has a tight-fitting lid to avoid spills.
Step-by-Step Instructions for Mason Jar Butter
- Start with Heavy Cream
Begin by pouring heavy cream into your mason jar. Fill the jar about halfway to leave room for shaking. This space allows the cream to move around and transform into butter. - Season with Salt
Add a pinch of salt to the cream. This step is optional but highly recommended if you enjoy slightly salted butter. You can also experiment with flavored salts, like garlic or herb-infused, for a unique twist. - Secure the Lid
Place the lid tightly on the mason jar. Make sure it’s sealed properly to prevent any leaks during the shaking process. - Shake It Up
The shaking process is where the magic happens! Shake the jar vigorously for about 10 minutes. In the beginning, you’ll hear a sloshing sound as the cream moves around. As you continue shaking, it will transform into whipped cream, then into a thick mass. - Listen for Changes
After 10 minutes, the sound will change from sloshing to a thudding noise. This indicates that the butter is forming. You’ll also notice the buttermilk separating from the butter at this stage. - Separate the Butter and Buttermilk
Open the jar and pour out the liquid (buttermilk) into a separate bowl. This buttermilk can be saved and used in recipes like pancakes, biscuits, or salad dressings. - Shape the Butter
Scoop out the butter from the jar and gently form it into a ball with your hands. This step ensures the butter is well-combined and smooth. - Rinse the Butter
Rinse the butter under cold water, kneading it gently until the water runs clear. This removes any remaining buttermilk, which helps extend the butter’s shelf life. - Store Your Homemade Butter
Place the butter in an airtight container or wrap it in parchment paper. Store it in the refrigerator, where it will stay fresh for up to two weeks.
Why Make Your Own Butter?
Homemade butter offers unmatched freshness and flavor compared to store-bought versions. Plus, it’s free from additives and preservatives. The process is cost-effective and a great way to use up extra heavy cream.
Tips for Perfect Homemade Butter
- Use cold heavy cream for a creamier texture.
- Shake the jar with consistent force to speed up the process.
- For a sweet version, skip the salt and mix in honey or maple syrup after forming the butter.
- Try adding fresh herbs, garlic, or lemon zest for a flavorful compound butter.
FAQs about Homemade Butter
Can I use a different container?
Yes, but a mason jar is ideal because of its secure lid and durability.
How do I know if my butter is ready?
Look for a solid mass and separated buttermilk. The sound and texture changes will guide you.
What can I do with leftover buttermilk?
Use it in baking, marinades, or smoothies for a tangy kick.
Fun Variations to Try
- Garlic Herb Butter: Mix minced garlic and chopped parsley into the butter for a savory spread.
- Sweet Cinnamon Butter: Add a touch of cinnamon and sugar for a delicious topping for bread or pancakes.
The Joy of Homemade Butter
Making butter in a mason jar is not just a recipe—it’s an experience. It connects you to traditional cooking methods and provides a satisfying sense of accomplishment. Once you’ve tasted your homemade butter, you’ll never look at store-bought butter the same way again.
Homemade Butter
Enjoy your homemade butter as a fresh, delicious spread for bread, cooking, or baking!
Prep Time: 2 minutes
Shake Time: 15 minutes
Total Time: 17 minutes
Ingredients
- Heavy Cream
- Salt
- Mason Jar with Lid
Instructions
- Pour heavy cream into a mason jar, filling it halfway.
- Add a pinch of salt.
- Secure the lid tightly.
- Shake the jar vigorously for about 10 minutes. Listen as the sound changes from sloshing to a thudding noise.
- Once the buttermilk separates from the butter, pour out the liquid into a bowl.
- Shape the butter into a ball with your hands.
- Rinse the butter under cold water until the water runs clear.
- Store the butter in the refrigerator.
