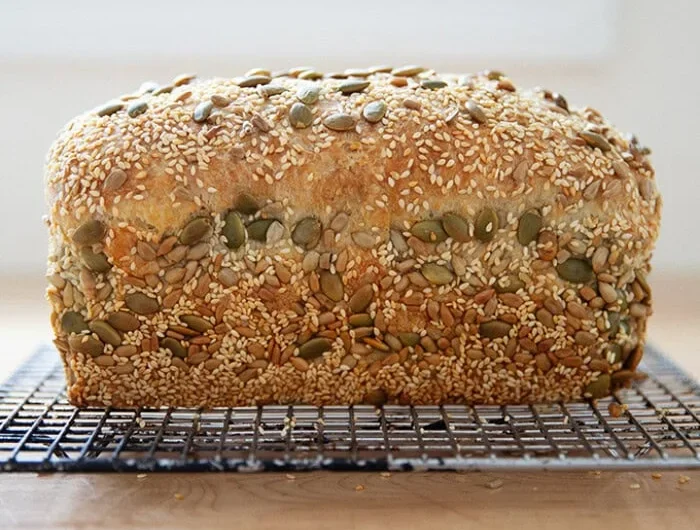

There is something especially satisfying about making a loaf of bread at home, particularly when the recipe does not require complicated kneading or special equipment. This three-seed bread is a straightforward loaf made with sunflower seeds, pumpkin seeds, and sesame seeds. The result is hearty and flavorful without being too dense, making it useful for everything from morning toast to sandwiches.
The dough comes together in one bowl with just a few minutes of mixing. After that, the yeast does most of the work while the dough rises. Once it has doubled in size, the dough is shaped, placed into a loaf pan, allowed to rise once more, and baked until the top is deeply golden.
The combination of seeds gives the bread a pleasant nuttiness and a little crunch. The sunflower and pumpkin seeds add substance, while sesame seeds bring a delicate toasted flavor. The seeds are mixed directly into the dough, so every slice has a little bit of texture throughout.
An optional coating of seeds on the outside makes the loaf particularly attractive. It also gives the crust extra crunch, but this step is not necessary. The bread will still turn out well without coating the pan or topping the loaf with additional seeds.
What Makes This Bread Easy
- The biggest advantage of this loaf is that there is no traditional kneading process. The ingredients are simply mixed until they form a sticky dough. Because the dough is relatively wet, it does not look like a smooth, firm bread dough at first. That is completely fine.
- The first rise gives the yeast time to develop the dough. During those two to three hours, the dough should become noticeably larger and approximately double in volume. A warm, draft-free place is ideal.
- After the first rise, a little olive oil is worked over the surface of the dough. This makes it easier to loosen the dough from the bowl and helps when shaping it. The dough can then be rolled into a simple coil or shaped into a loaf before being transferred to the prepared pan.
The Seed Mixture
- The three seeds used here are sunflower seeds, pumpkin seeds, and sesame seeds. They are added directly to the dough rather than being treated separately.
- There is no need to toast the seeds before mixing them into the bread. They develop plenty of nutty flavor during baking, and keeping the preparation simple means there is one less step before the dough can begin rising.
- The recipe also includes an optional amount of extra seeds for coating the loaf pan and topping the bread. If using them, the same combination of sunflower, pumpkin, and sesame seeds works particularly well.
- The coating is mostly for appearance and texture. It creates a rustic, seed-covered crust and gives the outside of the loaf a little more crunch.
Mixing the Dough
- Start with a large bowl so there is enough room for the dough to expand during the first rise.
- Add the flour, kosher salt, sugar, and instant yeast. Whisk these dry ingredients together so the salt, sugar, and yeast are distributed evenly through the flour.
- Add the sunflower seeds, pumpkin seeds, and sesame seeds, then whisk again. At this point, the dry mixture should contain the seeds evenly throughout.
- Pour in the lukewarm water, followed by one tablespoon of the olive oil. Use a rubber spatula to mix everything together.
- The dough will be sticky and soft. Continue mixing until the liquid has been absorbed and the ingredients come together into a sticky dough ball. If the spatula is not quite enough to bring the mixture together, briefly use your hands to gather the dough.
- There is no need to knead the dough until it becomes smooth. The goal at this stage is simply to make sure there are no dry pockets of flour and that everything is evenly combined.
The First Rise
- Cover the bowl with a damp tea towel, cloth bowl cover, or plastic wrap. Place it somewhere warm and away from drafts.
- Let the dough rise for about two to three hours.
- The exact amount of time can vary depending on the temperature of the room. Rather than relying only on the clock, look at the dough. It should have approximately doubled in volume.
- A warm kitchen can speed up the rise, while a cooler kitchen can make it take longer. Give the dough enough time to become visibly puffy and expanded before moving on to shaping.
Preparing the Loaf Pan
- While the dough is finishing its first rise, prepare a standard loaf pan.
- An 8.5-by-4.5-inch loaf pan produces a slightly taller loaf, while a 9-by-5-inch pan will give the bread a somewhat broader shape. Either size works for this recipe.
- Generously grease the pan with softened unsalted butter.
- For a seed-covered exterior, add the optional extra seeds to the pan. Turn the pan carefully so the seeds stick to the buttered sides and bottom. Once the surfaces are coated, pour out any excess seeds and keep them aside for the top of the loaf.
- The seed coating is optional. Leaving it out will not affect the basic bread-making process.
Shaping the Dough
- Once the dough has doubled, drizzle the remaining tablespoon of olive oil over its surface.
- Use your hand to spread the oil over the dough. Then gently work around the edges of the dough with your hand to loosen it from the sides of the bowl.
- Turn the dough over so that the oiled side is underneath.
- The dough can now be shaped. A simple way is to roll it into a coil, but it can also be formed into a loaf shape. The important thing is to shape it enough to fit comfortably inside the prepared loaf pan.
- Place the shaped dough into the pan with the seam side facing down.
- If using the reserved seeds, sprinkle them over the top. There is no need to use every remaining seed. Spread them gently with your hand or shake the pan carefully so they settle over the surface.
The Second Rise
- The shaped dough needs another rise before baking.
- Leave the loaf on the countertop, preferably somewhere warm and free from drafts, for about 45 minutes to one hour.
- Again, use the appearance of the dough as the main guide. It should rise significantly in the pan and become visibly puffy. Ideally, the dough will dome approximately one inch above the rim of the loaf pan.
- The second rise is important because it gives the shaped loaf its final lift before it enters the oven. Avoid rushing this stage if the dough still looks flat or compact.
Baking the Bread
- Preheat the oven to 375ºF.
- Once the loaf has risen sufficiently, transfer the pan to the oven.
- Bake for approximately 45 minutes. The top should be evenly browned when the bread is finished.
- The loaf should have a firm, golden crust. Because ovens can vary, the appearance of the bread is a useful indicator as it approaches the end of the baking time.
- When the bread is done, remove the pan from the oven. Carefully turn the loaf out onto a cooling rack.
Cooling Before Slicing
- It can be tempting to cut into freshly baked bread immediately, but giving the loaf time to cool makes a noticeable difference.
- Let the bread cool for at least 30 minutes before slicing. For a slightly longer cooling period, 30 to 60 minutes works well.
- Cooling allows the inside of the bread to settle and makes it easier to cut clean slices without compressing the crumb.
- Once cooled, the loaf can be sliced according to how it will be served.
How to Serve Three-Seed Bread
- This bread is sturdy enough for toast while remaining light enough for sandwiches.
- For breakfast, slices can be toasted until the edges become crisp and the seeds on the crust become fragrant. The hearty texture also works well with simple toppings.
- For sandwiches, the bread provides enough structure to hold fillings without feeling overly heavy. It can be used for both cold and toasted sandwiches.
- The combination of seeds also means the bread has plenty of flavor on its own, so it does not need complicated toppings to be enjoyable.
A Few Things to Keep in Mind
- The dough is supposed to be sticky. Avoid adding extra flour simply because it does not look like a traditional kneaded dough. The recipe is designed around a wet, easy-to-mix dough.
- The temperature of the water matters as well. Lukewarm water is appropriate for activating the yeast without making the process unnecessarily difficult.
- The rising times are approximate. If the kitchen is cool, the dough may need more time. If it is particularly warm, the dough may rise more quickly. Look for the dough to double during the first rise and become noticeably expanded during the second.
- The seed coating is completely optional. If used, butter the pan generously so the seeds have something to adhere to. Any leftover coating seeds can be sprinkled over the top of the loaf.
- An 8.5-by-4.5-inch pan creates a taller loaf, while a 9-by-5-inch pan produces a slightly wider loaf. Both are suitable.
- Most importantly, allow the baked bread enough time to cool before slicing. This makes the finished loaf easier to handle and gives the interior time to reach the right texture.
The Finished Loaf
- After baking and cooling, the finished bread should have a golden exterior with a hearty, seed-filled interior. Sunflower, pumpkin, and sesame seeds are distributed throughout the loaf, while the optional seed coating gives the crust an additional layer of crunch.
- The preparation is uncomplicated: mix, rise, shape, rise again, and bake. There is no lengthy kneading session, and the dough can be mixed entirely in one large bowl.
- With a total time of about 5 hours and 45 minutes, most of that time is hands-off rising and baking. The actual preparation is relatively simple, making this a practical homemade loaf for a regular baking day.
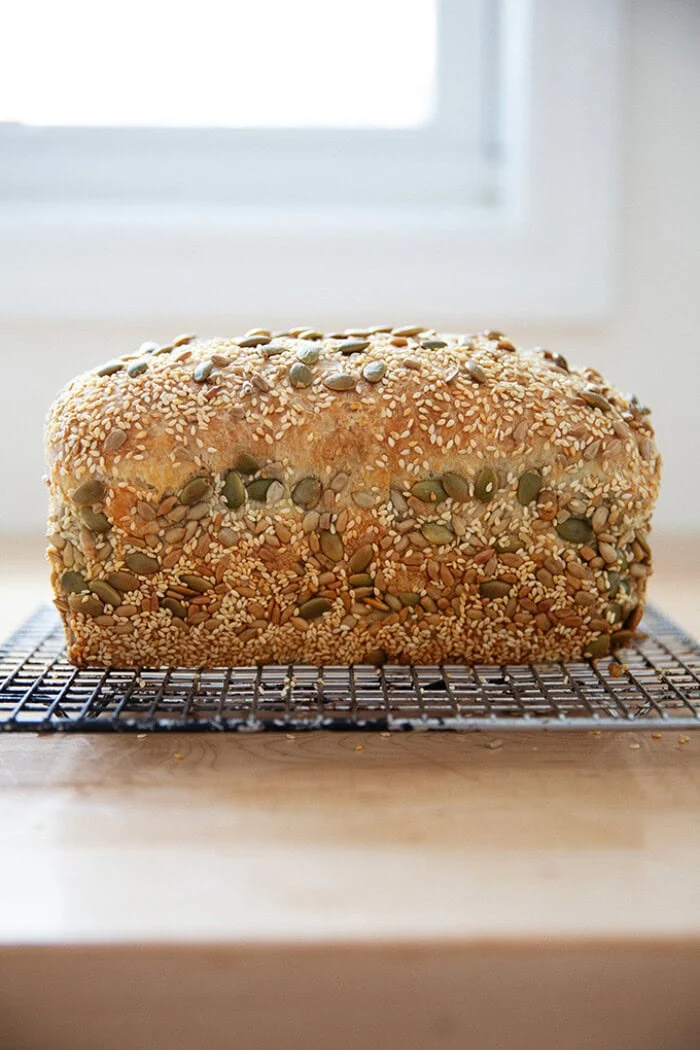
Healthy No Kneed Three-Seed Bread
A hearty no-knead bread made with sunflower, pumpkin, and sesame seeds. The loaf has a crisp, seed-studded crust and a tender interior that works beautifully for toast or sandwiches.
12
servings2
hours45
minutes205
kcalIngredients
3.25 cups (416 g) unbleached bread or all-purpose flour
1.5 teaspoons (5 g) kosher salt
1.5 teaspoons (7 g) sugar
1.5 teaspoons (5 g) instant yeast
¼ cup (40 g) sunflower seeds
¼ cup (40 g) pumpkin seeds
¼ cup (35 g) sesame seeds
1.5 cups (340 g) lukewarm water
2 tablespoons extra-virgin olive oil, divided
Softened unsalted butter, for greasing
1/2 to 3/4 cup seeds, optional, for coating the pan: mix another 1/4 cup each of sunflower, pumpkin, and sesame seeds
Directions
- In a large bowl, whisk together the flour, salt, sugar, and instant yeast. Add the sunflower, pumpkin, and sesame seeds and whisk again.
- Pour in the lukewarm water, followed by 1 tablespoon of olive oil. Mix with a rubber spatula until the liquid is absorbed and a sticky dough forms. If needed, briefly use your hands to bring the dough together.
- Cover the bowl with a damp tea towel, cloth bowl cover, or plastic wrap. Leave it in a warm place for 2 to 3 hours, or until the dough has doubled in volume.
- Preheat the oven to 375ºF. Generously butter an 8.5-by-4.5-inch or 9-by-5-inch loaf pan.
- If using the optional seed coating, add the seeds to the buttered pan and turn the pan so the seeds coat the bottom and sides. Pour out any excess seeds and reserve them.
- Once the dough has doubled, drizzle the remaining 1 tablespoon of olive oil over the surface. Rub the oil over the dough, then use your hand to loosen the dough from the sides of the bowl.
- Flip the dough over so the oiled side is underneath. Shape it into a coil or loaf shape and place it into the prepared pan, seam side down.
- Sprinkle the reserved seeds over the top, using as much as needed to cover the surface. Let the dough rise for 45 minutes to 1 hour, preferably in a warm, draft-free spot, until it has risen significantly and is doming about 1 inch above the rim of the pan.
- Bake for 45 minutes, or until the top is evenly browned.
- Remove the loaf from the oven and turn it out onto a cooling rack. Allow it to cool for at least 30 minutes before slicing.
Notes
- The seed coating is optional; the bread works well without it.
- An 8.5-by-4.5-inch pan makes a slightly taller loaf than a 9-by-5-inch pan.
- Rising times can vary depending on room temperature. Use the dough’s size and appearance as the main guide.
- The dough will be sticky after mixing; no extensive kneading is required.
- Allow the loaf to cool before slicing for the best texture.
- The finished bread is suitable for both toast and sandwiches.
Nutrition Facts
- Total number of serves: 12
- Calories: 205kcal
- Fat: 6g
- Sodium: 290mg
- Carbohydrates: 32g
- Fiber: 2.5g
- Protein: 7g
