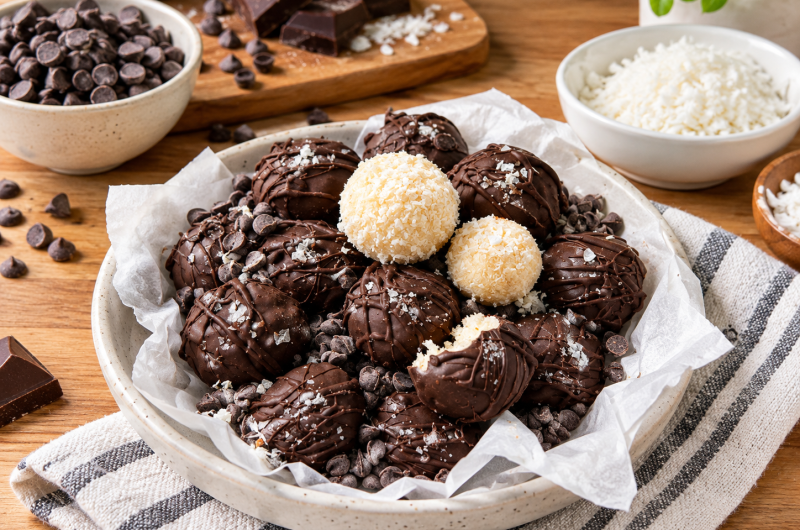

These homemade vegan Bounty balls are one of those simple treats that come together with very little effort. They have a soft, rich coconut center and can be finished in two different ways: coated in shredded coconut for a Raffaello-style treat or dipped in melted dark chocolate for that classic Bounty-inspired finish.
The recipe is no-bake, uses a handful of straightforward ingredients, and doesn’t require any complicated baking techniques. Once the coconut mixture is prepared, most of the work is simply waiting for it to chill and firm up.
I like making these when I want something sweet that can be kept in the refrigerator and enjoyed a little at a time. They also work nicely when you need a small homemade treat for guests, a dessert platter, or an edible gift.
What Makes These Coconut Balls So Easy?
- The base comes together in a food processor. Shredded coconut, coconut milk, rice or agave syrup, and vanilla extract are combined until they form a firm mixture that can be shaped by hand.
- There is no oven involved, and there is no need to prepare a separate dough or batter. The refrigerator does most of the work by allowing the coconut mixture to become thicker and easier to handle.
- For the finishing touch, the balls can be divided between two coatings. Half can be rolled in shredded coconut, while the other half can be dipped in melted dark chocolate.
- Of course, you can also keep things simple and use just one coating for the whole batch.
Ingredients for the Coconut Center
- Shredded Coconut
- Shredded coconut forms the main part of the filling. It gives the balls their characteristic coconut texture and provides the base for the entire recipe.
- Coconut Milk
- Coconut milk helps bring the shredded coconut together and gives the filling a softer, richer texture. The recipe works with coconut milk from a carton or with the solid and liquid parts mixed together from a can
- Rice or Agave Syrup
- A small amount of rice or agave syrup adds sweetness and helps bring the mixture together. If using the ingredients exactly as listed, either rice syrup or agave syrup can be used.
- Vanilla Extract
- Vanilla extract adds a gentle background flavor. It works particularly well with the coconut and chocolate and gives the finished balls a more rounded dessert-like taste.
For the Coating
- Dark Chocolate
- Melted dark chocolate gives the balls their Bounty-style chocolate shell. The amount listed in the recipe is enough for the coating, although the notes include an option for making the chocolate layer richer.
- Shredded Coconut
- A little extra shredded coconut can be used for coating the balls and for sprinkling over the chocolate while it is still soft.
Optional Additions
- The recipe also includes a few optional flavor and filling ideas.
- A hazelnut can be placed inside the coconut mixture before shaping the balls. This gives the finished treat a crunchy center.
- For a slightly different flavor, almond or rum extract can be added. These are optional, so the basic coconut and chocolate version can be made without them.
Equipment
There isn’t much equipment needed for this recipe. I use:
- A food processor
- A medium-sized bowl with a lid or foil
- Two small bowls
- A spoon or ice-cream scoop
- Parchment paper
- A plate or tray for chilling the finished balls
- An ice-cream scoop isn’t essential, but it makes portioning the mixture easier and helps keep the balls roughly the same size.
Making the Coconut Mixture
- Start by placing the shredded coconut, coconut milk, rice or agave syrup, and vanilla extract into the food processor.
- There is no need to process the mixture for a long time. Pulse it two or three times, just enough to incorporate everything together.
- After pulsing, check the texture. The mixture should be fairly firm and hold together rather than looking loose or runny.
- Transfer the coconut mixture to a medium-sized bowl.
- Cover the bowl with its lid or with foil and place it in the refrigerator.
- Let it chill for about one hour.
- This chilling step is important because it allows the coconut mixture to thicken. After it has rested in the refrigerator, it should be much easier to scoop and shape.
Shaping the Coconut Balls
- Once the coconut mixture has chilled for about an hour, take it out of the refrigerator.
- Use a spoon or an ice-cream scoop to portion out small amounts of the mixture.
- Wet your hands lightly and shape each portion into a small ball. The slightly damp hands make the mixture easier to handle and help prevent too much of it from sticking to your fingers.
- Place the shaped balls on a plate while you finish the remaining mixture.
- Try to keep the portions reasonably similar in size. They don’t have to be perfectly round or identical. These are homemade treats, so a little variation is perfectly fine.
- If you want to add the optional hazelnut filling, place a hazelnut inside the coconut mixture before closing it and rolling the mixture into a ball.
- Continue until all of the coconut mixture has been shaped.
Preparing the Two Coatings
- The recipe gives you the option of making two styles of coconut balls.
- For the coconut-coated version, place some shredded coconut in a small bowl.
- For the chocolate-coated version, melt the dark chocolate and place it in another small bowl.
- You can melt the chocolate either in the microwave or using a hot water bath.
- If using the microwave, heat the chocolate carefully in short intervals and stir between each interval. The goal is simply to melt it smoothly without overheating it.
- If using a hot water bath, place the chocolate in a heat-safe bowl over hot water and stir until melted.
- Keep water away from the chocolate while melting it so the chocolate stays smooth.
Making the Coconut-Coated Balls
- Take some of the chilled coconut balls and roll them gently in the shredded coconut.
- Turn each one until the outside is covered.
- This creates a simple coconut-covered treat with a soft coconut center and a slightly textured exterior.
- For a batch with two different finishes, roll approximately half of the balls in shredded coconut and leave the other half ready for the chocolate coating.
Making the Chocolate-Coated Bounty Balls
- Take the remaining chilled coconut balls and dip them into the melted dark chocolate.
- Turn them carefully so the chocolate covers the outside.
- Let any excess chocolate drip back into the bowl before placing each ball onto parchment paper.
- If you like, sprinkle a little shredded coconut over the chocolate while it is still soft.
- The coconut will stick to the chocolate as it sets and gives the finished balls a simple decorative look.
- Continue coating the remaining balls until you have used all of the coconut mixture.
Chilling the Finished Treats
- Line a plate with parchment paper and place all of the finished coconut and chocolate balls on it.
- Once everything has been coated, place the plate in the refrigerator again.
- Let the balls chill for about one hour.
- During this second chilling period, the chocolate coating sets and the coconut balls become firm.
- After they have chilled, they are ready to serve.
- I prefer serving these balls straight from the refrigerator because they have a pleasantly firm texture and the coconut flavor comes through nicely when they are cold.
Two Ways to Enjoy the Same Recipe
- One nice thing about this recipe is that you don’t have to choose between a chocolate coating and a coconut coating.
- You can make both from the same coconut mixture.
- The coconut-coated version is lighter and has a simple, snowy appearance. It is especially nice when you want the coconut flavor to be the main focus.
- The dark chocolate version has a richer finish and gives the balls that familiar chocolate-and-coconut combination.
- Making both versions also gives you some variety when serving them on a dessert plate.
For a Simple Homemade Treat
- These coconut balls don’t need much decoration. A little shredded coconut on top of the chocolate is enough.
- The important part is allowing the coconut mixture to chill before shaping and giving the finished balls enough time in the refrigerator to set.
- Because the recipe is no-bake, it is also easy to prepare ahead of time. You can make the balls, chill them, and keep them ready in the refrigerator until you want to serve them.
Storage
- Once prepared, keep the Bounty balls in an airtight container in the refrigerator.
- They can be stored in the fridge for up to one week.
- Keeping them chilled also helps them maintain their shape and texture.
- If you are preparing them for guests or as an edible gift, it is best to keep them refrigerated until serving.
Serving Ideas
- These coconut balls are easy to serve on their own, but they also work well alongside a drink or fresh fruit.
- They can be served chilled with almond milk latte, vanilla soy milk, or fresh seasonal fruit.
- For a dessert platter, arrange the coconut-covered and chocolate-covered balls together. The different finishes make the platter look more varied without requiring extra decoration.
- They are also convenient for meal preparation because they can be made in advance and stored in the refrigerator.
Helpful Tips
- Chill Before Shaping
- Don’t skip the first refrigeration period. The hour in the refrigerator gives the coconut mixture time to thicken and makes shaping much easier.
- Keep Your Hands Slightly Wet
- If the mixture sticks to your hands while forming the balls, wet your hands lightly before shaping the next one.
- Don’t Overcomplicate the Coating
- You can make all of the balls coconut-coated, all chocolate-coated, or divide the batch between the two. The recipe works either way.
- Melt the Chocolate Carefully
- Whether you use a microwave or hot water bath, melt the dark chocolate gently and stir it until smooth.
- Add the Decoration Before Chilling
- If you want shredded coconut on the chocolate coating, sprinkle it over the balls before putting them into the refrigerator. Once the chocolate sets, the coconut will no longer stick easily.
- Make Them Bar-Shaped
- The same coconut mixture can also be shaped into bars instead of balls. The ingredients and preparation remain the same; only the shape changes.
- Make the Chocolate Layer Thicker
- For a more chocolate-heavy version, the recipe notes that you can increase the amount of chocolate used for coating and even create two layers.
- Try an Optional Flavor
- Almond or rum extract can be used when you want a deeper flavor. These are optional additions, so the basic recipe remains a simple coconut-and-chocolate treat.
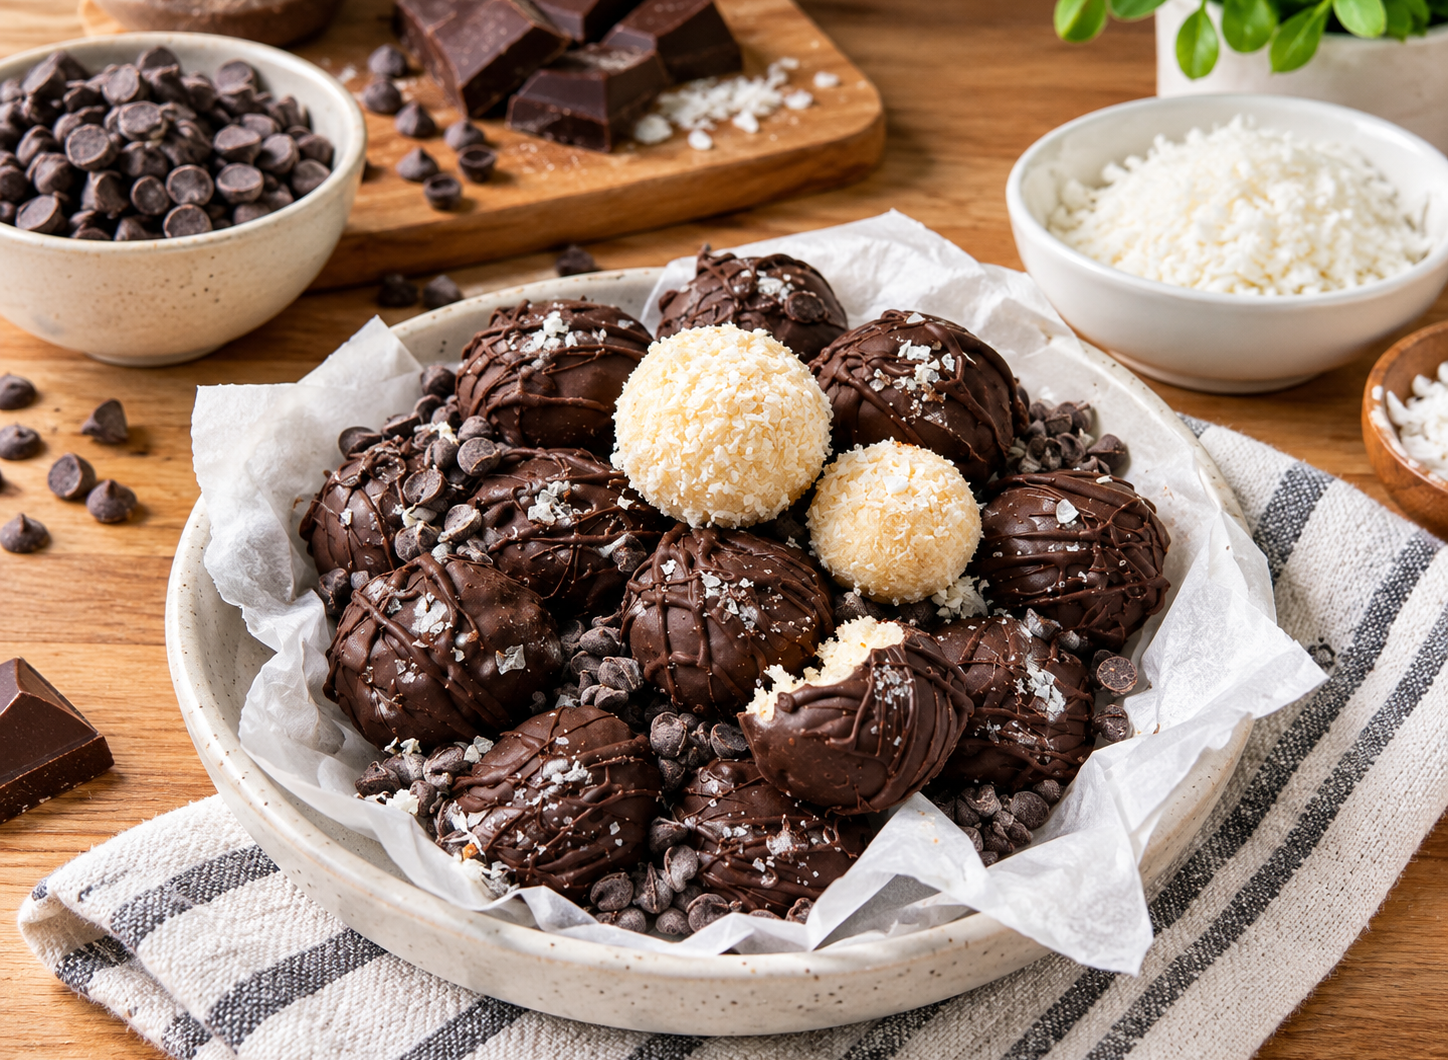
Healthy Vegan Bounty Balls
These easy vegan Bounty balls are made with a soft, coconut-filled center and finished with either shredded coconut or melted dark chocolate. They are no-bake, simple to prepare, and best served chilled. Make both coatings for a combination of coconut-covered and chocolate-covered treats.
4
servings15
minutes0
minutes300
kcalIngredients
2 cups shredded coconut (160 g)
1 cup coconut milk (240 g)
1 tbsp rice or agave syrup
2 tsp vanilla extract
- Coating
⅔ cup dark chocolate, melted (100 g)
Shredded coconut, about ½ cup
- Optional
Almond or rum extract
Hazelnut for filling
Directions
- Add the shredded coconut, coconut milk, rice or agave syrup, and vanilla extract to a food processor.
- Pulse 2–3 times until everything is incorporated and the mixture has a fairly firm texture.
- Transfer the mixture to a bowl, cover with a lid or foil, and refrigerate for 1 hour.
- Remove the chilled mixture from the refrigerator. Use a spoon or ice-cream scoop to portion it, then shape each portion into a small ball with your hands.
- Place shredded coconut in one small bowl and melted dark chocolate in another.
- Roll half of the balls in shredded coconut for a coconut-coated finish.
- Dip the remaining balls into the melted dark chocolate. Sprinkle with shredded coconut if desired.
- Arrange all the finished balls on a plate lined with parchment paper.
- Refrigerate for another hour, or until the coating has set.
- Serve chilled or store in an airtight container in the refrigerator for up to 1 week.
Notes
- The dark chocolate can be melted in the microwave or using a hot water bath.
- For a thicker chocolate coating, increase the amount of chocolate and make two layers.
- The coconut mixture can also be shaped into bars instead of balls.
- Almond or rum extract can be added for a deeper flavor.
- For a crunchy center, place a hazelnut inside each ball before shaping.
Nutrition Facts
- Total number of serves: 12
- Calories: 190kcal
- Fat: 14g
- Saturated Fat: 11g
- Sodium: 10mg
- Carbohydrates: 17g
- Fiber: 4g
- Sugar: 10g
- Protein: 2g
