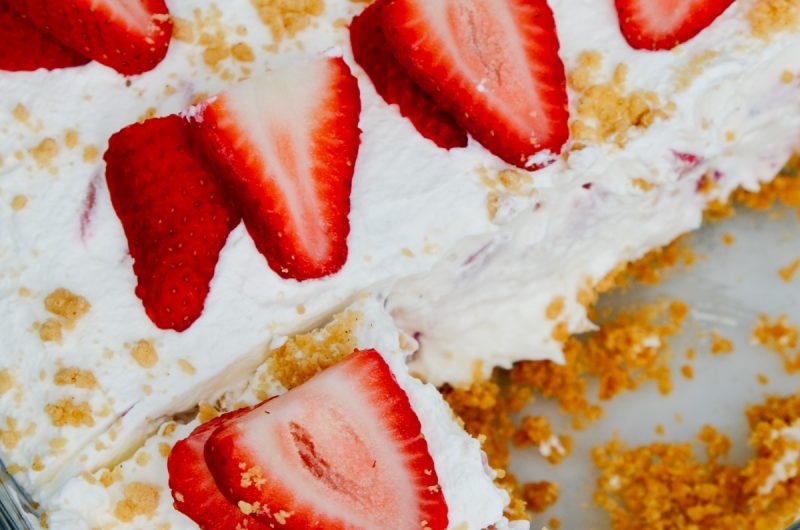

When the weather is warm, a dessert that does not require turning on the oven is always welcome. This no-bake keto strawberry cream cheese icebox cake brings together a crunchy cereal crumb layer, smooth cream cheese filling, fresh strawberries, and lightly sweetened vanilla whipped cream.
The cake is assembled in layers, then chilled until everything has had time to firm up and the flavors come together. The result is creamy, refreshing, and easy to slice and serve.
This dessert is especially convenient when strawberries are in season. The fresh berries add a juicy, fruity layer that works beautifully with the rich cream cheese and whipped cream. The crushed keto cereal gives the dessert a little texture, keeping every bite from being completely soft and creamy.
Since the dessert is assembled in an 8 x 8-inch baking dish, it is also a nice size for a small gathering or family dessert. There is no complicated baking process involved, and most of the preparation consists of mixing, whipping, and layering.
What Makes This Icebox Cake Easy
- There are three main components to prepare: the cereal crumb mixture, the cream cheese filling, and the whipped cream. Once those are ready, the dessert is simply layered in the baking dish.
- The cereal is crushed first. Two cups of the crumbs are combined with melted butter to create the base. The remaining cereal crumbs are kept aside because they are used between the layers and as a finishing garnish.
- For the cheesecake layer, softened cream cheese is mixed with sugar-free confectioners sugar and vanilla extract. The cream cheese should be at room temperature before mixing. This helps it become smooth and creamy rather than leaving small lumps in the finished filling.
- The whipped cream is prepared separately. Cold heavy whipping cream is whipped until soft peaks begin to form, then vanilla and sugar-free confectioners sugar are added. The mixture is whipped further until stiff peaks form. Some of this whipped cream is folded into the cream cheese mixture, creating a lighter cheesecake filling.
Preparing the Cereal Crumbs
- Start by placing the keto cereal in a food processor. Blend until the cereal becomes crumbly.
- There is no need to turn the cereal into a completely fine powder. A crumbly texture works well because it gives the finished dessert some texture. Once the cereal has been crushed, measure out the amount needed for the crust and reserve the remaining crumbs for layering.
- Melt the butter and allow it to cool slightly before combining it with two cups of the prepared cereal crumbs.
- Stir the butter and cereal together until the crumbs are evenly coated. This mixture will form the bottom layer of the icebox cake.
Building the Bottom Layer
- Transfer the butter-coated cereal crumbs to an 8 x 8-inch baking dish. Press them evenly across the bottom of the dish.
- The crumbs should be pressed firmly enough to create a base, but there is no need to pack them extremely hard. Try to make the layer as even as possible so that the cream cheese filling will spread easily across it later.
- Once the crust is pressed into place, put the baking dish in the refrigerator while the cream cheese mixture is prepared.
- This short chilling period gives the butter-coated crumbs a chance to firm up.
Making the Cream Cheese Filling
- Place the room-temperature cream cheese in a medium mixing bowl. Using a hand mixer, blend it on medium-high speed until it becomes creamy.
- Add one teaspoon of vanilla extract, then gradually add one-fourth cup of the sugar-free confectioners sugar. Continue mixing until everything is well combined.
- The finished mixture should be smooth and creamy. Taking the time to soften the cream cheese before beginning makes this step much easier.
- The cream cheese mixture is only part of the filling. The whipped cream will be prepared separately and then folded into it.
Making the Vanilla Whipped Cream
- Pour the heavy whipping cream into a separate large mixing bowl.
- Begin whipping on low speed until the cream starts to thicken and soft peaks begin to form. This takes about 4 to 5 minutes. Gradually increase the mixer speed to medium.
- Add the remaining one teaspoon of vanilla extract and the remaining one-fourth cup of sugar-free confectioners sugar.
- Continue whipping until stiff peaks form. The total whipping time is approximately 8 to 9 minutes.
- Keep an eye on the texture as you whip. The goal is a thick whipped cream that holds its shape. If using a stand mixer, the whisk attachment works well for this step.
- Once the whipped cream is ready, measure out two cups and gently fold them into the prepared cream cheese mixture. Fold rather than vigorously stir so the mixture stays light and creamy.
- At this point, you will have two separate components ready for assembly: the cream cheese and whipped cream mixture, and the remaining prepared whipped cream.
Preparing the Strawberries
- While the creamy components are ready, prepare the strawberries.
- Hull the strawberries and dice the amount needed for the layers. It is also helpful to set aside a few of the nicest strawberries for the top of the cake.
- Discard strawberries that are bruised or mushy. The berries used for layering should be fresh and firm enough to hold their shape.
- The strawberries are not cooked or mixed into the cream. They are added directly to the layers, which keeps their fresh flavor and texture.
Assembling the First Layers
- Take the chilled baking dish out of the refrigerator.
- Spread one cup of the cream cheese mixture over the cereal crust. Work gently so the crust stays in place underneath. Spread the filling into an even layer from edge to edge.
- Next, add one cup of the diced strawberries over the cream cheese layer. Try to distribute the strawberries evenly so that the fruit is present throughout the dessert rather than concentrated in just a few spots.
- Add one cup of the prepared whipped cream over the strawberries and spread it into an even layer.
- Now sprinkle the remaining one cup of cereal crumbs over the whipped cream. Reserve two tablespoons of the crumbs for garnishing the finished cake.
Finishing the Layers
- Once the first set of layers is complete, repeat the layering process with the remaining ingredients.
- Add the remaining cream cheese mixture, followed by the remaining strawberries and then the remaining whipped cream.
- Smooth the top carefully with a spatula or the back of a spoon.
- Finish the cake with sliced strawberries and the reserved cereal crumbs. The strawberries add a bright, colorful finish, while the crumbs give the top a little texture.
- The finished dessert should have clearly defined layers of crunchy crumbs, creamy filling, strawberries, and whipped cream.
Why Chilling Matters
- Although this is a no-bake dessert, chilling is an important part of the recipe.
- The cake can technically be assembled and served once it has been prepared, but giving it several hours in the refrigerator allows the layers to firm up. The cereal crumbs also have time to soften slightly from the surrounding creamy layers without completely losing their texture.
- For the best result, chill the assembled cake for 6 to 8 hours before serving.
- This also makes the dessert convenient for preparing ahead. It can be assembled earlier in the day and kept refrigerated until it is time for dessert.
Simple Ingredient Changes
- The basic ingredients can be adjusted while keeping the same style of dessert.
- Other berries, such as raspberries or blueberries, can be used instead of or alongside the strawberries. A teaspoon of lemon juice can also be added to the cream cheese mixture for a fresh citrus note.
- For a slightly different flavor, almond extract can replace the vanilla extract.
- The cereal base can also be changed. Sugar-free cookies can be used in place of the keto cereal. If there is room in the macronutrient plan, graham cracker crumbs can be used as well.
- The sugar-free confectioners sugar can be replaced with regular confectioners sugar if a low-carb version is not needed.
- For the whipped cream, pre-made whipped topping can be used instead of whipping heavy cream. A 16-ounce tub, or 4 cups, is needed. When keeping the dessert keto, choose a sugar-free whipped topping.
Keeping the Dessert Fresh
- Once assembled, the icebox cake should be covered with a lid or plastic wrap and stored in the refrigerator or freezer until ready to enjoy.
- Refrigeration is especially useful when the cake is being prepared ahead of time. Keep it covered so that the whipped cream stays fresh and the dessert does not absorb other refrigerator odors.
- If using the freezer, allow the cake enough time to soften to a pleasant serving texture before serving.
A Few Helpful Tips
- Room-temperature cream cheese is one of the easiest ways to get a smooth cheesecake layer. Cold cream cheese can be difficult to blend evenly and may leave small lumps.
- Keep the heavy whipping cream cold until it is time to whip it. Cold cream whips more effectively and helps produce a fluffy texture.
- When combining whipped cream with the cream cheese mixture, fold gently. Overmixing can make the filling heavier and reduce some of the light texture.
- The cereal crumbs should also be divided carefully. Two cups are used with the melted butter for the crust, while the remaining cup is used later in the layers. Two tablespoons of the remaining crumbs are reserved for the final garnish.
- The strawberries can be prepared while the creamy mixtures are being made, which keeps the assembly process moving smoothly.
Serving the Icebox Cake
- After the cake has chilled for 6 to 8 hours, slice it into nine servings.
- Because the dessert contains several creamy layers, use a sharp knife and wipe it clean between cuts if you want neat-looking pieces. Each serving should show the different layers of cereal crumbs, cream cheese, strawberries, and whipped cream.
- The finished dessert is creamy without being overly heavy, with fresh strawberries providing a bright contrast to the rich cream cheese and whipped cream. The cereal crumbs add a little crunch and make the texture more interesting.
- This is a straightforward no-bake dessert that can be prepared in advance, kept chilled, and brought out when it is ready to serve
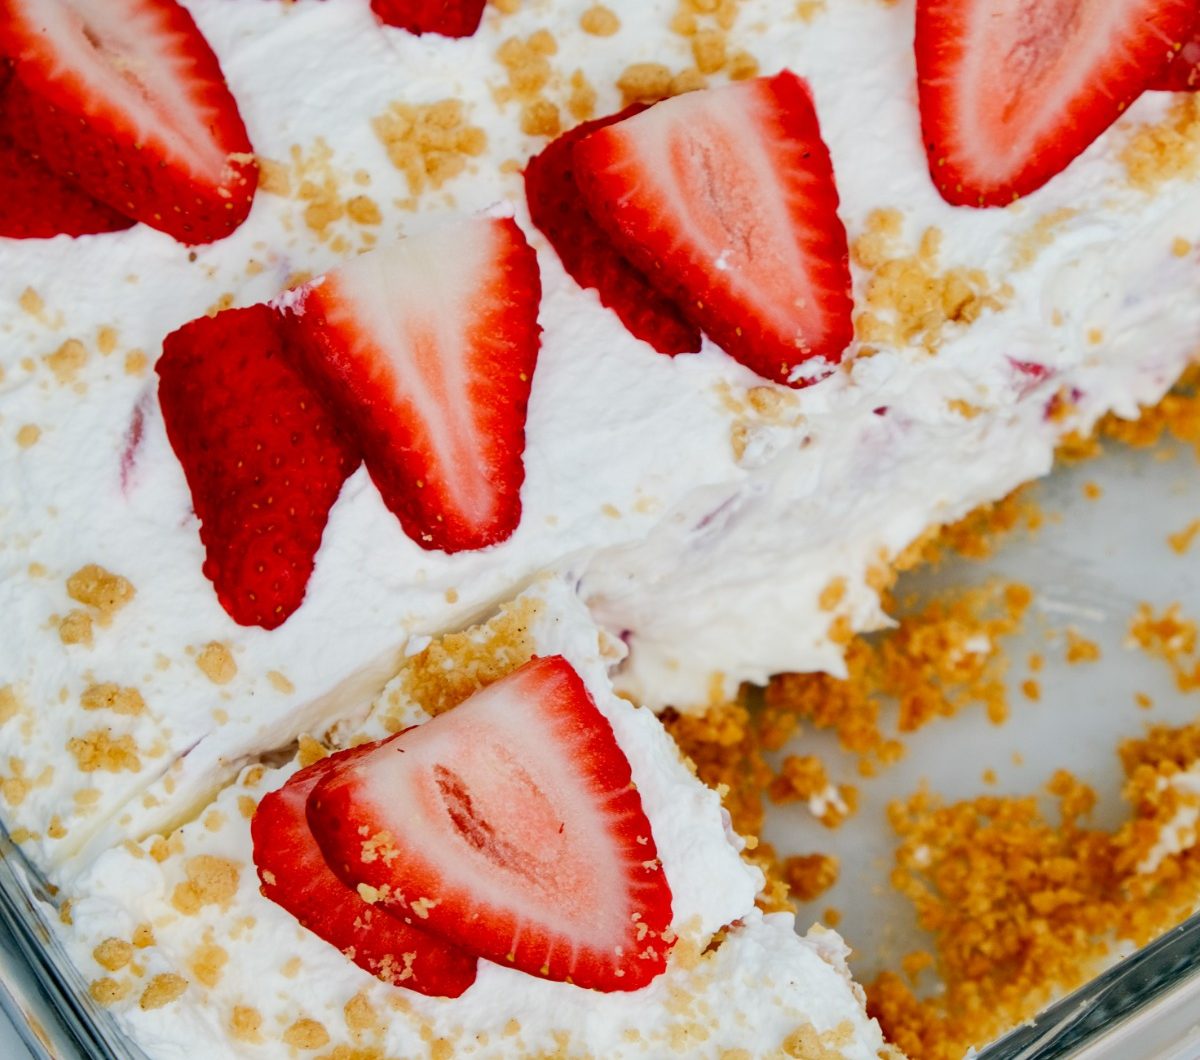
No-Bake Keto Strawberry Cream Cheese Icebox Cake
A cool, creamy no-bake keto dessert made with crushed keto cereal, butter, cream cheese, fresh strawberries, and vanilla whipped cream. The layered dessert is chilled until firm and finished with sliced strawberries and cereal crumbs.
9
servings25
minutes353
kcalIngredients
3 cups Catalina Crunch Keto Cinnamon Toast or Honey Graham Cereal, crushed and divided
6 tablespoons butter, melted and cooled
8 ounces cream cheese, room temperature
1/2 cup sugar-free confectioners sugar, divided
1 pint heavy whipping cream (2 cups)
2 teaspoons vanilla extract, divided
1 pint fresh strawberries, hulled and diced, plus extra for garnishing
Directions
- Place the keto cereal in a food processor and blend until crumbly. Set aside.
- Mix the melted and cooled butter with 2 cups of the cereal crumbs. Reserve the remaining 1 cup of crumbs for layering.
- Press the butter-coated crumbs evenly into the bottom of an 8 x 8-inch baking dish. Refrigerate while preparing the filling.
- Add the room-temperature cream cheese to a medium mixing bowl. Beat with a hand mixer on medium-high speed until creamy.
- Add 1 teaspoon vanilla extract and gradually mix in 1/4 cup sugar-free confectioners sugar. Continue mixing until smooth and combined.
- Pour the heavy whipping cream into a separate large mixing bowl. Whip on low speed until soft peaks form, about 4–5 minutes, gradually increasing the speed to medium.
- Add the remaining 1 teaspoon vanilla extract and remaining 1/4 cup sugar-free confectioners sugar. Continue whipping until stiff peaks form, about 8–9 minutes total.
- Gently fold 2 cups of the prepared whipped cream into the cream cheese mixture
- Remove the chilled crust from the refrigerator. Spread 1 cup of the cream cheese mixture evenly over the crust.
- Add 1 cup of diced strawberries over the cream cheese layer.
- Spread 1 cup of the prepared whipped cream over the strawberries.
- Sprinkle the remaining 1 cup of cereal crumbs over the whipped cream, reserving 2 tablespoons for garnishing.
- Repeat the layers with the remaining cream cheese mixture, strawberries, and whipped cream.
- Garnish the top with sliced strawberries and the reserved cereal crumbs.
- Cover and refrigerate for 6–8 hours before serving.
Notes
- Bring the cream cheese to room temperature before mixing for a smoother filling.
- Keep the heavy whipping cream cold until ready to whip
- If using a stand mixer, the whisk attachment works well for the whipped cream.
- To stabilize the whipped cream, add 1 teaspoon of cream of tartar when incorporating the sweetener.
- Other berries, including raspberries or blueberries, can be used.
- A teaspoon of lemon juice can be added to the cream cheese mixture.
- Almond extract can be used in place of vanilla extract.
- Sugar-free cookies can replace the keto cereal for the base
- Regular confectioners sugar can replace the sugar-free confectioners sugar.
- Graham cracker crumbs or cookie wafers can be used when a low-carb dessert is not required
- If using pre-made whipped topping, use 4 cups or a 16-ounce tub.
- Store the covered dessert in the refrigerator or freezer until ready to serve.
Nutrition Facts
- Serving Size: 9 g
- Calories: 353kcal
- Fat: 35g
- Saturated Fat: 22g
- Trans Fat: 0.3g
- Polyunsaturated Fat: 2g
- Monounsaturated Fat: 9g
- Cholesterol: 105mg
- Sodium: 154mg
- Potassium: 167mg
- Carbohydrates: 7g
- Fiber: 1g
- Sugar: 5g
- Protein: 3g
- Vitamin A: 1.351mcg
- Vitamin C: 31mg
