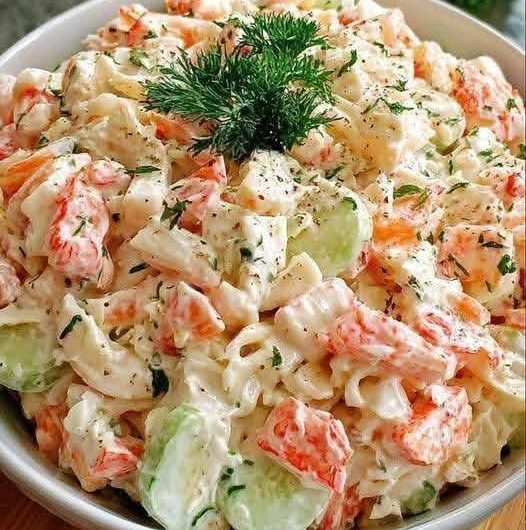

Russian Potato Salad
Russian Potato Salad, commonly known as Olivier Salad, is one of the most famous salads in Russia and many Eastern European countries. It is a hearty, creamy, and satisfying dish made with potatoes, vegetables, eggs, pickles, and mayonnaise. Traditionally served during celebrations, family gatherings, and holidays, it can also be enjoyed as a complete meal.
Ingredients
For the Salad
- 1 kg potatoes (about 6–8 medium potatoes)
- 4 medium carrots
- 1 cup green peas (fresh, frozen, or canned)
- 6 large eggs
- 300 g cooked chicken breast, cooked beef, ham, or bologna sausage (optional but traditional in many versions)
- 6 medium dill pickles, finely diced
- 1 small onion, very finely chopped (optional)
- 1 medium apple, peeled and diced (optional for a sweeter taste)
- 1 tablespoon fresh dill, finely chopped
- 1 tablespoon fresh parsley, finely chopped
- Salt to taste
- Black pepper to taste
For the Dressing
- 1½ cups mayonnaise
- 2 tablespoons sour cream
- 1 teaspoon Dijon mustard
- 1 teaspoon pickle juice
- ½ teaspoon sugar
- Salt to taste
- Black pepper to taste
Equipment Needed
- Large cooking pot
- Medium saucepan
- Mixing bowls
- Sharp knife
- Cutting board
- Measuring cups and spoons
- Colander
- Large serving bowl
Step 1: Preparing the Potatoes
Wash the potatoes thoroughly under running water to remove all dirt. Leave the skins on because this helps the potatoes retain their texture during boiling.
Place the potatoes in a large pot and cover them completely with cold water. Add about 1 tablespoon of salt to the water. Bring the water to a boil over medium-high heat.
Once boiling, reduce the heat slightly and cook for approximately 20–30 minutes, depending on the size of the potatoes. Check for doneness by inserting a knife into the center. The knife should slide in easily but the potatoes should not be falling apart.
Drain the potatoes immediately and allow them to cool completely. Once cooled, peel off the skins and cut the potatoes into small cubes approximately ½ inch in size. Uniform cubes make the salad look attractive and ensure even flavor distribution.
Step 2: Cooking the Carrots
Wash and peel the carrots. Place them in a saucepan and cover with water.
Bring to a boil and cook for 15–20 minutes until tender but not mushy. The carrots should still hold their shape when diced.
Drain the carrots and allow them to cool. Dice them into cubes similar in size to the potatoes. Keeping the vegetables the same size gives the salad a classic appearance.
Step 3: Preparing the Eggs
Place the eggs in a saucepan and cover with cold water.
Bring the water to a gentle boil. Once boiling, cook for 10–12 minutes to achieve hard-boiled eggs.
Transfer the eggs immediately into a bowl of ice water. Let them cool completely before peeling.
Peel the eggs and cut them into small cubes. Some people prefer using an egg slicer for uniform pieces.
Step 4: Preparing the Green Peas
If using fresh peas, blanch them in boiling water for 2–3 minutes and then transfer them to ice water.
If using frozen peas, cook them according to package instructions and cool completely.
If using canned peas, simply drain them thoroughly.
The peas should remain bright green and slightly firm.
Step 5: Preparing the Meat
Traditional Olivier Salad often includes cooked meat.
For chicken:
- Season chicken breast lightly with salt.
- Poach gently in simmering water for 15–20 minutes.
- Cool completely and dice into small cubes.
For beef:
- Simmer until tender, about 1½–2 hours.
- Cool and dice finely.
For ham or bologna:
- Simply cut into cubes matching the size of the vegetables.
The meat should be fully cooled before mixing with the other ingredients.
Step 6: Preparing the Pickles
Dill pickles are an essential component because they provide acidity and crunch.
Pat the pickles dry using paper towels to remove excess moisture.
Cut them into very small cubes. Excess liquid can make the salad watery, so draining is important.
Reserve a teaspoon of pickle juice for the dressing.
Step 7: Optional Ingredients
Onion
Finely chop the onion into very small pieces.
For a milder flavor, soak the chopped onion in cold water for 10 minutes and drain thoroughly before adding to the salad.
Apple
Peel and core the apple.
Cut into small cubes and toss with a few drops of lemon juice to prevent browning.
Apples add a subtle sweetness that balances the tangy pickles.
Step 8: Making the Dressing
In a medium bowl combine:
- Mayonnaise
- Sour cream
- Dijon mustard
- Pickle juice
- Sugar
- Salt
- Black pepper
Whisk until smooth and creamy.
Taste the dressing and adjust seasoning as desired. The dressing should be rich, slightly tangy, and well balanced.
Step 9: Combining the Salad
In a very large mixing bowl combine:
- Diced potatoes
- Diced carrots
- Green peas
- Chopped eggs
- Diced meat
- Pickles
- Onion (if using)
- Apple (if using)
- Fresh dill
- Fresh parsley
Mix gently with a large spoon.
Avoid overmixing because the potatoes may break down and become mushy.
Step 10: Adding the Dressing
Pour about three-quarters of the dressing over the salad.
Fold everything together gently until evenly coated.
Add more dressing if necessary. The salad should be creamy but not swimming in mayonnaise.
Season with additional salt and pepper if needed.
Step 11: Chilling the Salad
Cover the bowl tightly with plastic wrap or a lid.
Refrigerate for at least 2–4 hours.
For the best flavor, allow the salad to chill overnight. This resting time helps all the ingredients absorb the dressing and blend together beautifully.
Step 12: Final Adjustments Before Serving
Remove the salad from the refrigerator about 15 minutes before serving.
Stir gently.
If the salad appears dry, mix in a little extra mayonnaise or sour cream.
Taste and adjust seasoning one final time.
Traditional Serving Suggestions
Russian Potato Salad is commonly served:
- During New Year celebrations
- At family gatherings
- Alongside roasted meats
- With grilled chicken
- As part of a holiday buffet
- With rye bread
- As a filling lunch on its own
Storage Instructions
Store the salad in an airtight container in the refrigerator.
It remains fresh for up to 3 days when properly chilled.
Do not leave the salad at room temperature for more than 2 hours because it contains mayonnaise and eggs.
Tips for the Best Russian Potato Salad
- Cook the potatoes with their skins on to prevent waterlogging.
- Allow all ingredients to cool completely before mixing.
- Cut ingredients into uniformly sized cubes for a professional appearance.
- Use good-quality mayonnaise because it significantly affects the final flavor.
- Do not skip the pickles; they provide the characteristic Olivier Salad taste.
- Chill the salad thoroughly before serving.
- Fresh dill adds authentic Russian flavor.
- Avoid overmixing to maintain texture.
- Taste repeatedly during preparation and adjust seasoning gradually.
- Making the salad a day ahead often produces even better flavor than serving it immediately.
This detailed Russian Potato Salad recipe yields approximately 8–10 generous servings and closely resembles the classic Olivier Salad enjoyed throughout Russia and Eastern Europe.
