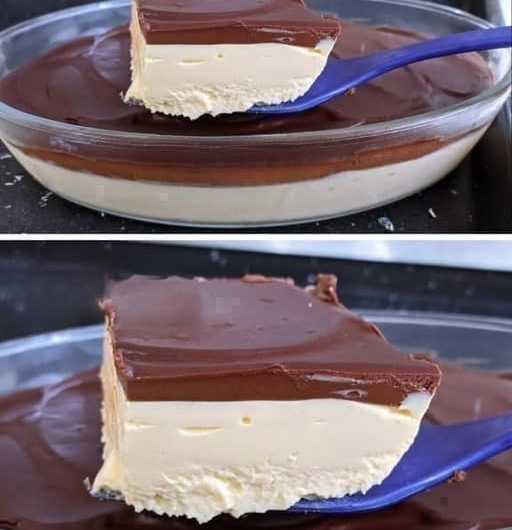

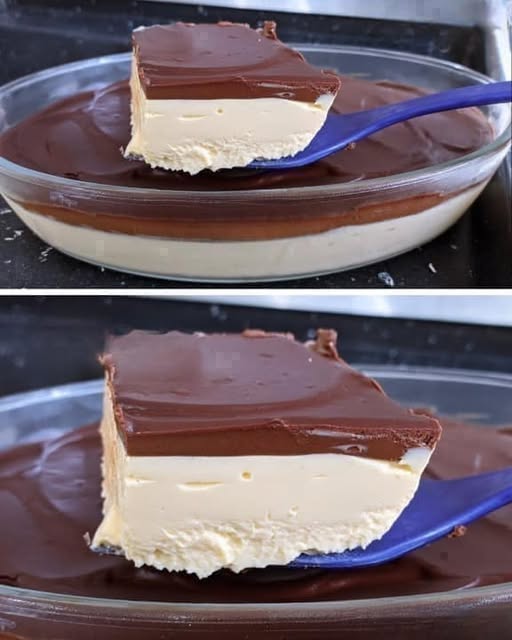
When I want to make a dessert that looks impressive without requiring a lot of complicated preparation, this Layered Chocolate Pudding Dessert is one of the easiest choices. It has several creamy layers, but each one is simple to put together. The finished dessert has a buttery cookie crust on the bottom, a smooth cream cheese layer in the middle, a rich combination of chocolate and vanilla pudding, and a final layer of whipped topping with chocolate sprinkles.
I like making this dessert when I need something that can be prepared ahead of time. Since it needs to be refrigerated, it works especially well when I want to finish dessert before the rest of the meal is ready. Once the layers are assembled, I can put the dish in the refrigerator and let it chill until it is time to serve.
The first thing I do is get my baking dish ready. I use a 9×13-inch baking dish and grease it with butter or shortening. This gives the crust a little extra protection from sticking and makes serving easier later.
Starting With the Cookie Crust
- The bottom layer is a very simple mixture made with all-purpose flour, powdered sugar, and melted unsalted butter. There is no need to make a complicated pastry or use any special equipment.
- I put the flour, powdered sugar, and melted butter into a medium bowl. The original method also allows these ingredients to be mixed directly in the prepared baking dish, but I prefer using a bowl because it gives me enough room to combine everything evenly.
- I start by stirring the mixture with a fork. At first, it looks crumbly and doesn’t immediately resemble dough. I keep stirring until the ingredients begin to come together. Then I use my hands to gently bring everything together until I have a soft dough.
- Once the dough is ready, I transfer it to the greased baking dish and press it evenly across the bottom. I make sure the crust reaches into the corners and is spread in an even layer. It doesn’t need to be thick or fancy; the important thing is to create an even base for the layers that will go on top.
Baking the Crust Carefully
- I preheat the oven to 350°F before baking the crust. Once the dough is pressed evenly into the dish, I place it in the oven and bake it for 12–15 minutes.
- This is one step where I pay close attention because I don’t want to overbake the crust. The edges should become lightly browned, while the center can still look slightly underbaked when it comes out of the oven.
- That softer appearance in the center is okay. The crust continues to set as it cools, so I don’t keep baking it just because the middle doesn’t look completely firm.
- Overbaking can make the crust harder than I want for this dessert. I want a tender cookie-like base that works well with the soft cream cheese and pudding layers.
- After baking, I leave the crust alone and let it cool completely. This is important because the next layer is creamy and needs to be spread over a cool surface. If the crust is still warm, the cream cheese layer won’t have the same smooth texture.
Making the Cream Cheese Layer
- While the crust is cooling, I can prepare the second layer. This part comes together quickly.
- I use a large bowl to combine the powdered sugar, cream cheese, and 8 ounces of whipped topping. I beat everything together until the mixture is smooth and creamy.
- The cream cheese gives this layer a rich, slightly tangy flavor, while the powdered sugar makes it sweet. The whipped topping keeps the mixture light enough to spread easily.
- Once the crust has cooled completely, I spoon the cream cheese mixture over it. I gently spread it across the entire surface, taking care not to disturb the crust underneath.
- I find it easiest to work from the center toward the edges and corners. Since the crust has already cooled and set, the cream cheese mixture should spread across it without much trouble.
- This layer doesn’t need to be perfectly thick or perfectly smooth, but I try to keep it as even as possible. An even layer makes the finished dessert look neat when it is cut and served.
Preparing the Chocolate Pudding Layer
- The next layer brings the chocolate flavor to the dessert. Instead of using only chocolate pudding, I combine one package of vanilla instant pudding with one package of chocolate instant pudding.
- I put both pudding mixes into a bowl and add 3 cups of cold milk. I whisk the mixture for about 2 minutes.
- As I whisk, the pudding begins to thicken. I want the mixture to be smooth and well combined before adding it to the dessert.
- After whisking, I place the pudding in the refrigerator for 5 minutes. This short chilling time helps it become thick enough to spread over the cream cheese layer.
- Once the pudding has chilled, I take it out and spread it over the cream cheese layer. I work gently so the layers stay separate rather than getting mixed together.
- The combination of vanilla and chocolate pudding gives the dessert a balanced pudding layer while keeping the overall flavor strongly chocolaty.
Finishing With Whipped Topping
- After the pudding layer is spread evenly, I add the remaining 8 ounces of whipped topping.
- I spread it gently over the pudding, covering the entire surface. This final creamy layer makes the dessert look finished and gives every serving a soft, smooth topping.
- For a simple finishing touch, I sprinkle chocolate sprinkles over the top. They add a little extra chocolate flavor and make the dessert look more inviting without requiring any complicated decoration.
- At this point, all the layers are finished. The dessert has the buttery cookie crust, creamy cream cheese layer, chocolate-vanilla pudding layer, and whipped topping on top.
Letting the Dessert Chill
- I keep the finished dessert in the refrigerator. Chilling is an important part of the process because it allows the layers to become properly set and gives the dessert its cool, creamy texture.
- I also find that a chilled layered dessert is much easier to serve. When it is ready, I can cut it into portions and lift each piece from the dish.
- Since this dessert has several soft layers, keeping it refrigerated also helps maintain its shape. I don’t leave it sitting out unnecessarily, especially when I’m not serving it right away.
Getting the Layers Right
- The main thing I focus on while making this dessert is keeping the layers even and allowing the crust to cool completely before moving on.
- The crust is the foundation, so I press it evenly into the baking dish. I also watch the baking time closely. Twelve to fifteen minutes is enough to give the edges a light golden color without making the crust too firm.
- For the second layer, I make sure the cream cheese mixture is beaten until smooth before spreading it over the crust. Any lumps in this layer can make spreading more difficult, so I take a little time to make the mixture creamy.
- The pudding layer is also easy as long as I use cold milk and whisk the pudding mixes thoroughly. After the five-minute refrigerator rest, it should be ready to spread.
- Finally, I add the remaining whipped topping and chocolate sprinkles. There is no need for elaborate decoration because the different layers already give the dessert plenty of visual appeal.
Serving the Dessert
- When I serve this dessert, I like to cut it into individual portions so the different layers are visible. Each piece has a little of everything: the buttery cookie crust, sweet cream cheese mixture, chocolate pudding, and whipped topping.
- The texture is soft and creamy from the middle layers, while the crust gives the dessert some structure underneath. The chocolate sprinkles provide a simple finishing touch.
- This is the kind of dessert that works well when I want something sweet but don’t want to spend hours preparing it. Most of the work involves mixing, spreading, and giving each layer enough time to set.
A Few Things I Keep in Mind
- I always make sure the crust doesn’t become too brown. The edges should be lightly browned, but the center can still look slightly underbaked when it comes out of the oven. It will continue to set as it cools.
- I also don’t try to spread the cream cheese mixture over a warm crust. Waiting until the crust is completely cool makes the layering process much easier.
- When making the pudding, I use cold milk and whisk for about 2 minutes. The five-minute refrigerator time afterward gives the pudding a chance to thicken before it goes into the baking dish.
- For the final layer, I spread the whipped topping gently rather than pressing down heavily. This helps keep the pudding layer underneath intact.
- Once everything is assembled, I store the dessert in the refrigerator. The chilled layers make the finished dessert creamy, cool, and easy to portion.
Why This Dessert Is So Easy
- What I like most about this recipe is that every part has a straightforward purpose. The crust requires only three ingredients and a short baking time. The cream cheese layer only needs three ingredients combined until smooth. The pudding layer requires two pudding mixes and cold milk. The final topping is simply whipped topping and chocolate sprinkles.
- There are no complicated decorating techniques and no difficult pastry work. Once the crust is baked and cooled, the rest of the dessert is simply a matter of preparing each mixture and spreading it over the previous layer.
- The result is a dessert with several textures and flavors without making the preparation complicated.
The Finished Dessert
- Once the dessert has been refrigerated, it is ready to serve. The bottom crust provides a soft cookie-like foundation, while the cream cheese layer adds richness. The chocolate and vanilla pudding creates the main creamy chocolate layer, and the whipped topping makes the top light and smooth.
- I keep the dessert refrigerated until serving so the layers stay firm enough to cut and serve neatly.
- This Layered Chocolate Pudding Dessert is a simple way to turn a handful of familiar ingredients into a creamy, chocolate-filled dessert with an attractive layered presentation. The preparation is uncomplicated, the ingredients stay exactly as they are, and the finished dessert is easy to portion and serve.
- eThe most important details are simple: don’t overbake the crust, let it cool completely, give the pudding its short refrigerator rest, spread each layer evenly, and keep the finished dessert refrigerated. Following those steps gives me the soft, creamy, layered texture that makes this dessert so enjoyable
Keto ULtimate Foolproof Classic Layered Chocolate Dessert
A creamy layered dessert made with a sweet cookie crust, smooth whipped cream cheese, chocolate and vanilla pudding, whipped topping, and chocolate sprinkles.
15
servings1
hour18
minutes380
kcalIngredients
1 cup all-purpose flour
1 cup powdered sugar
1 stick unsalted butter, melted
1 cup powdered sugar
8 ounces cream cheese
8 ounces whipped topping (1/2 of a large 16-ounce container)
1 (3.4 ounce) box vanilla instant pudding
1 (3.4 ounce) box chocolate instant pudding
3 cups cold milk
8 ounces whipped topping (remaining 1/2 of a large 16-ounce container)
Directions
- Preheat the oven to 350°F. Grease a 9×13-inch baking dish with butter or shortening
- Prepare the crust: Combine the flour, powdered sugar, and melted butter in a medium bowl. Stir with a fork until the mixture starts coming together, then gently mix with your hands until a soft dough forms.
- Press the dough evenly into the bottom of the prepared baking dish. Bake for 12–15 minutes, until the edges are lightly browned and the center still looks slightly underbaked. Do not overbake. Let the crust cool completely.
- Prepare the cream cheese layer: Beat the powdered sugar, cream cheese, and 8 ounces of whipped topping in a large bowl until smooth and creamy. Spread evenly over the cooled crust.
- Prepare the pudding layer: Whisk the vanilla instant pudding, chocolate instant pudding, and 3 cups cold milk for about 2 minutes. Refrigerate for 5 minutes, then spread evenly over the cream cheese layer
- Spread the remaining 8 ounces of whipped topping over the pudding layer.
- Refrigerate until ready to serve.
Notes
- Do not overbake the crust. The edges should be lightly browned while the center can still look slightly underbaked.
- The crust will continue to set as it cools.
- Let the crust cool completely before adding the cream cheese layer.
- Cold milk helps the instant pudding thicken properly.
- Keep the finished dessert refrigerated.
Nutrition Facts
- Calories: 380kcal
- Fat: 19g
- Saturated Fat: 11g
- Cholesterol: 45mg
- Sodium: 300mg
- Carbohydrates: 48g
- Fiber: 1g
- Sugar: 34g
- Protein: 5g
