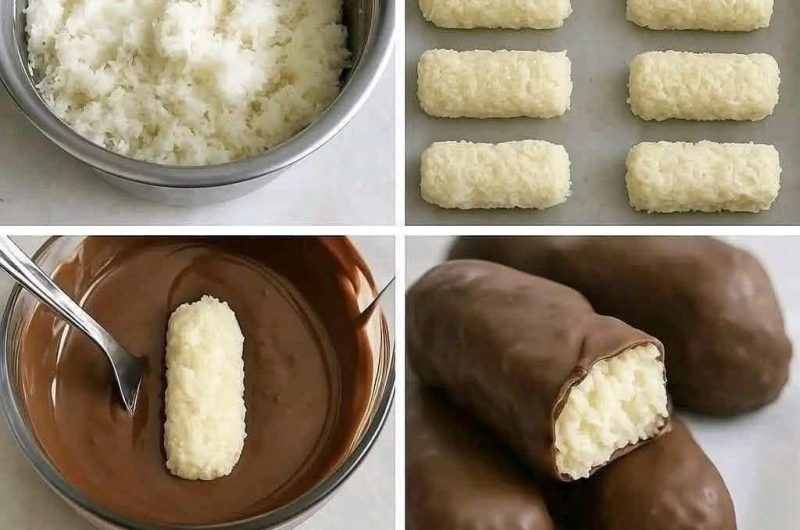

These healthy chocolate coconut balls are one of those easy treats that come together without turning on the oven. The center is made with raw coconut chips, coconut butter, erythritol, coconut milk, coconut extract, vanilla, and a small pinch of salt. Once the mixture is processed until it holds together, it is shaped into small balls, chilled, and then covered with a thin coating of melted sugar-free chocolate.
The finished coconut balls have a soft, slightly chewy coconut center and a smooth chocolate coating. They are sweet without being overly sugary, which makes them suitable as a small dessert or a quick snack when something sweet is wanted.
The recipe makes 15 balls and takes about 25 minutes of preparation, followed by chilling time. Since there is no baking involved, most of the work is simply processing the coconut mixture, shaping it, melting the chocolate, and dipping the balls.
What Makes This Recipe So Easy
- The biggest advantage of this recipe is that there is no complicated baking process. There is no dough to roll out, no oven temperature to monitor, and no baking time to worry about. A food processor does most of the work for the coconut filling.
- I start by preparing the coconut mixture until it becomes fine enough to shape. The mixture should also begin to clump together. This is important because the balls need enough moisture and texture to hold their shape. If the mixture feels loose or falls apart when rolled, it simply needs a little more processing.
- Once the filling is ready, I portion it into small amounts and roll each portion between my palms. The original recipe uses portions of about ⅝ ounce, or approximately one packed tablespoon per ball. After shaping all of them, they go into the freezer briefly. This makes the centers firm enough to handle during the chocolate-dipping stage.
Getting the Coconut Filling Right
- The filling begins with raw coconut chips. It is important to use raw coconut chips rather than toasted or baked coconut because the recipe is designed around the texture and flavor of the raw ingredient.
- Coconut flakes can also be used, and shredded coconut can work as well. If shredded coconut is used, it generally does not need as much processing because the pieces are already finer.
- The coconut chips are combined with coconut butter, erythritol, full-fat canned coconut milk, coconut extract, vanilla extract, and salt. The coconut butter helps bring the mixture together, while the coconut milk adds moisture. Coconut extract gives the filling an extra boost of coconut flavor, and vanilla adds another layer of flavor without changing the basic character of the coconut.
- I put all of these filling ingredients into the food processor fitted with the steel blade attachment. Then I process the mixture until it starts to clump and reaches a consistency that can be rolled easily.
- There is no need to process it endlessly. The goal is a fine enough mixture that sticks together when pressed. If the mixture still breaks apart while shaping, it can go back into the food processor for a few more seconds.
Shaping the Coconut Balls
- Once the filling reaches the right consistency, I line a small cookie sheet or pan with parchment paper or foil. This gives the shaped coconut balls a clean surface to rest on and makes the later chocolate-dipping process easier.
- I scoop the coconut mixture into portions of about ⅝ ounce each, which is roughly one packed tablespoon. Each portion is rolled between the palms until it becomes a compact ball.
- The balls do not need to look perfectly identical. The important thing is that each one is packed firmly enough to hold its shape. If a portion is difficult to roll or keeps breaking apart, that is a sign that the mixture needs a little more processing.
- After all 15 balls are shaped, I place the tray in the freezer for about 10 to 15 minutes. This short chilling period firms the coconut centers without requiring a long wait.
Preparing the Chocolate Coating
- While the coconut balls are chilling, the chocolate coating can be prepared. The coating uses only two ingredients: chopped sugar-free chocolate and coconut oil.
- The coconut oil helps create a smooth coating that is easier to work with when dipping. Unrefined coconut oil adds more coconut flavor, while refined coconut oil can also be used.
- I place the chopped sugar-free chocolate and coconut oil in a small mixing bowl. The chocolate is melted in the microwave in 30-second increments, stirring after each interval. This gradual method allows the chocolate to melt evenly while giving it a chance to become smooth between heating periods.
- The chocolate should be smooth before dipping the coconut balls. If there are still solid pieces, another short heating interval can be used, followed by stirring.
Dipping the Chilled Coconut Balls
- Once the coconut balls are firm and the chocolate is smooth, it is time to coat them.
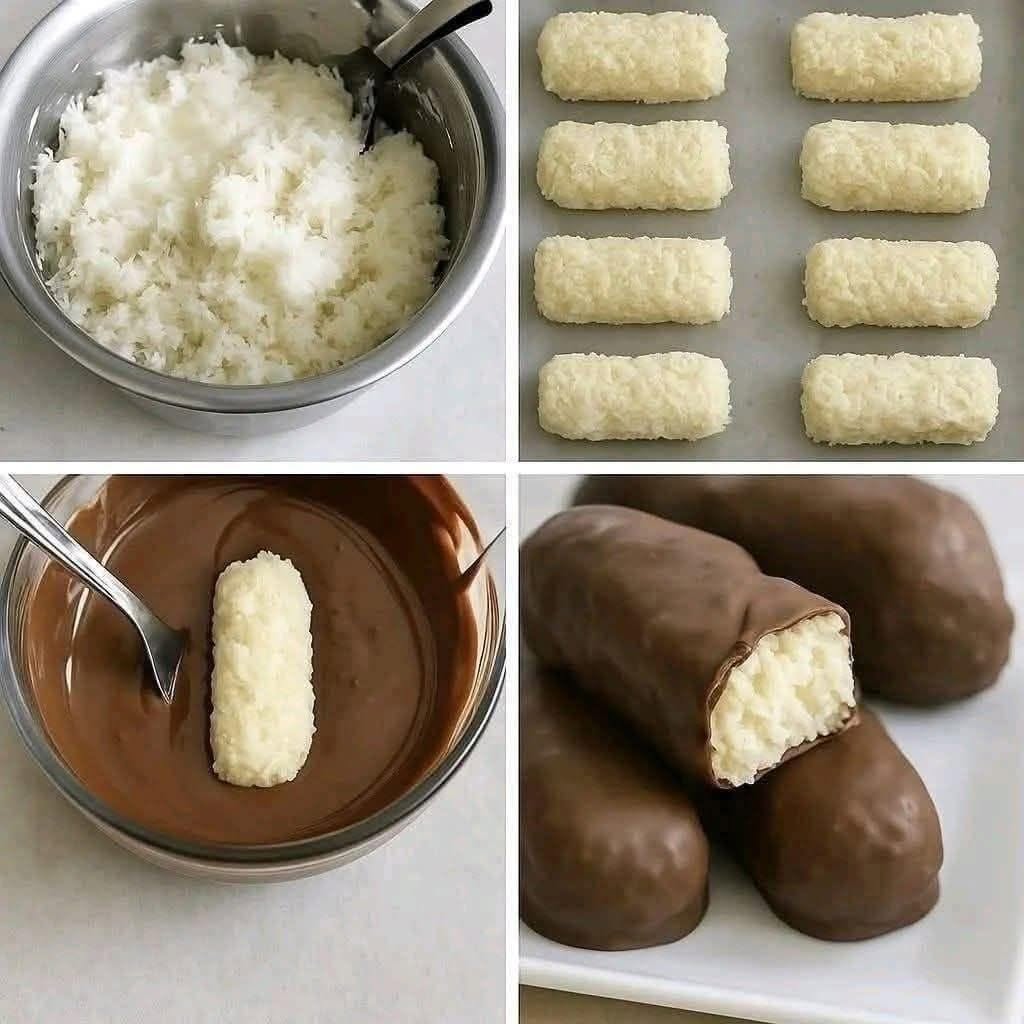
- I take one coconut ball at a time and dip it into the melted chocolate using a fork or toothpick. The ball should be completely covered with chocolate. After lifting it out, I gently tap off the excess chocolate so the coating stays thin rather than forming a thick layer.
- The coated ball is placed back onto the parchment- or foil-lined tray. I repeat the same process with the remaining coconut balls.
- A fork works well because it allows excess chocolate to drip away before the ball is placed on the tray. A toothpick can also be used to handle the balls during dipping.
- There is no need to rush this stage. Working with one ball at a time keeps the process simple and helps make sure every piece gets an even coating.
Letting the Chocolate Set
- After all the coconut balls have been dipped, I transfer the tray to the refrigerator. The chocolate needs time to firm up before the coconut balls are ready to eat.
- About 10 minutes in the refrigerator should be enough for the chocolate to set. Once the coating is firm, the balls can be served.
- The contrast between the chilled coconut center and the set chocolate coating gives these little treats their finished texture. The coconut center remains slightly chewy, while the chocolate forms a thin outer layer.
Ingredient Choices That Matter
- The recipe uses erythritol as the sweetener. It is a low-carb, zero-calorie sugar alcohol and keeps the recipe suitable for the keto and low-carb variation described in the original recipe. Granulated sugar can be used instead if the recipe does not need to remain keto.
- Full-fat canned coconut milk is used in the filling. Only 1½ ounces, or 2 tablespoons plus 2½ teaspoons, is needed for the recipe. Heavy cream can be substituted for the coconut milk, although that option is not vegan. Water can also be used, although it is described as a slightly less ideal alternative.
- For the chocolate coating, sugar-free chocolate keeps the recipe aligned with the low-carb version. Unsweetened dark chocolate can also be used and sweetened with powdered erythritol, or 60–70% dark chocolate can be used for a non-keto variation.
- If using unsweetened dark chocolate, the provided ingredient notes specify adding 1½ tablespoons of powdered erythritol once the chocolate is melted.
Texture and Flavor
- These coconut balls are designed to have a noticeable coconut flavor rather than a heavy, overly sweet dessert taste. The raw coconut chips and coconut butter create the main flavor and texture, while the coconut extract makes that flavor more pronounced.
- The chocolate coating balances the coconut center. Because it is applied as a thin layer, the chocolate does not completely overwhelm the filling.
- The result is a small coconut-centered treat with a dark chocolate exterior. It can work as a dessert after a meal or as a mid-day snack when a sweet bite is wanted.
Storage
- Once finished, the chocolate coconut balls can be stored in an airtight container or zip-top bag in the refrigerator for 2–3 weeks. They can also be frozen for up to 3 months.
- For everyday storage, the refrigerator keeps the chocolate coating firm and the coconut centers chilled. If freezing, they can be kept in a suitable airtight container or freezer-safe zip-top bag.
- Because the recipe makes 15 balls, it is also convenient to prepare the full batch and keep them available for later rather than making a small amount each time.
A Straightforward Way to Make Them at Home
- The whole process is easier when everything is prepared before starting. I line the tray first, measure the filling ingredients, and have the chopped chocolate and coconut oil ready for the coating.
- The filling is processed first because it needs to be shaped and chilled before dipping. Once the balls are in the freezer, the chocolate can be melted. This keeps the preparation moving without adding unnecessary steps.
- The most important thing is the consistency of the coconut mixture. It should be fine enough to roll and should start clumping together. If it will not hold its shape, a few additional seconds in the food processor can make the difference.
- After that, the process is simply roll, chill, dip, and chill again.
- There is no baking, no complicated decorating, and no long list of steps. The final result is a batch of 15 chocolate-coated coconut balls with a lightly sweet coconut center and a smooth chocolate shell.
Low Carb Gluten Free Chocolate Coconut Balls
These no-bake chocolate coconut balls have a slightly chewy coconut center covered with a thin layer of dark chocolate.
15
servings25
minutes25
minutes129
kcalIngredients
4 ½ ounces (2 ¼ cups, packed) raw coconut chips
2 ¼ ounces (¼ cup) coconut butter/manna
2 ¼ ounces (⅓ cup) granulated erythritol
1 ½ ounces (2 tablespoons plus 2 ½ teaspoons) full-fat canned coconut milk
1 tablespoon coconut extract
½ teaspoon vanilla extract
Pinch of salt
3 ounces sugar-free chocolate, chopped
1 ¼ teaspoons coconut oil
Directions
- Prepare the Coconut Filling
Add the raw coconut chips, coconut butter, erythritol, coconut milk, coconut extract, vanilla extract, and salt to a food processor fitted with the steel blade attachment. - Process until the mixture starts to clump together and becomes fine enough to roll into balls.
- If the mixture does not hold together when pressed, process it for a few more seconds.
- Line a small cookie sheet or pan with parchment paper or foil.
- Scoop the coconut mixture into ⅝-ounce portions, about 1 packed tablespoon each.
- Roll each portion between your palms to form a ball.
- Place the shaped balls on the prepared tray.
- Freeze for about 10–15 minutes, or until firm.
- Place the chopped sugar-free chocolate and coconut oil in a small mixing bowl.
- Microwave in 30-second increments, stirring between each interval, until the chocolate is completely smooth.
- Dip the chilled coconut balls one at a time into the melted chocolate using a fork or toothpick.
- Make sure each ball is completely coated.
- Gently tap off the excess chocolate.
- Place each coated ball back on the parchment- or foil-lined tray.
- Refrigerate for about 10 minutes, or until the chocolate has set.
Notes
- Coconut chips: Raw coconut chips are recommended. Coconut flakes can be substituted. Shredded coconut can also work but generally requires less processing
- Sweetener: Granulated sugar can replace erythritol for a non-keto variation.
- Coconut milk: Full-fat canned coconut milk can be replaced with heavy cream or water.
- Chocolate: Unsweetened dark chocolate can be used with 1½ tablespoons powdered erythritol added after melting. For a non-keto variation, 60–70% dark chocolate can also be used.
- Coconut oil: Unrefined coconut oil gives more coconut flavor, while refined coconut oil is also suitable.
- Storage: Store in an airtight container or zip-top bag in the refrigerator for 2–3 weeks, or freeze for up to 3 months.
Nutrition Facts
- Serving Size: 1 g
- Total number of serves: 15
- Calories: 129kcal
- Fat: 11.4g
- Cholesterol: 0mg
- Sodium: 13.1mg
- Carbohydrates: 5g
- Fiber: -2g
- Sugar: 0.7g
- Protein: 1.3g
- Vitamin A: 0mcg
- Vitamin C: 0mg
