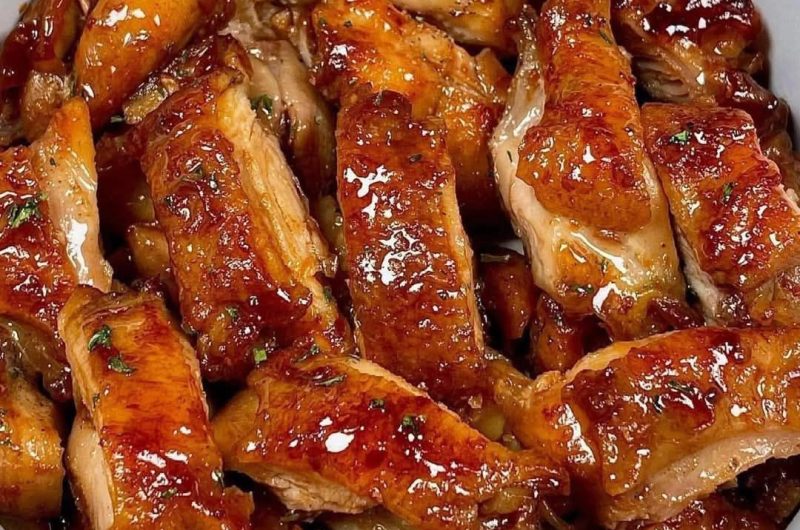

Chicken thighs are one of my favorite cuts to work with because they stay tender and juicy even when cooked over high heat. Unlike leaner cuts that can dry out quickly, chicken thighs handle searing and glazing beautifully. They develop a golden crust on the outside while staying flavorful and moist inside.
The best part of this recipe is the combination of textures and flavors. The chicken is lightly coated with cornstarch before cooking, which creates a delicate crispy layer. Instead of using heavy breading or deep frying, the cornstarch gives the chicken a light, crisp coating that holds onto the glaze perfectly.
The glaze is where all the flavor comes together. A combination of low-sodium soy sauce, honey, sesame oil, chili crunch, garlic, and ginger creates a sauce that is sweet, savory, slightly spicy, and packed with depth. As the glaze simmers in the pan, it thickens and turns glossy, coating every piece of chicken with a beautiful sticky finish.
This is the kind of meal that works perfectly for a busy weeknight dinner or when you want something comforting and flavorful. Serve it over steamed rice, alongside roasted potatoes, or with a simple salad, and you have a complete meal that feels restaurant-inspired but is easy enough to prepare at home.
Why This Honey Glazed Chicken Works So Well
- The magic of this recipe comes from a few simple cooking techniques. Each step plays an important role in creating the final dish.
A Crispy Coating Without Deep Frying
- The cornstarch coating is the secret behind the texture of this chicken. When the chicken thighs are lightly coated before cooking, the cornstarch creates a thin crust that becomes golden and crisp during searing.
- The goal is not to create a thick coating like traditional fried chicken. Instead, the cornstarch forms a light layer that gives each bite a little crunch while allowing the glaze to stick beautifully.
- It is important to shake off any extra cornstarch before cooking. Too much coating can make the chicken heavy, while a light coating gives the perfect balance between crispiness and tenderness.
Chicken Thighs Keep Everything Juicy
- For this recipe, chicken thighs are the ideal choice. They have enough fat and flavor to stay juicy during cooking, especially when seared in a hot pan.
- Both boneless and bone-in chicken thighs can work, but boneless, skinless thighs make this recipe quicker and easier for everyday cooking. They cook evenly, absorb the glaze well, and are simple to serve.
- Chicken thighs also pair especially well with bold flavors like soy sauce, garlic, ginger, and chili because their rich flavor can stand up to the sauce without being overwhelmed.
The Sweet and Savory Glaze Balance
- A good glaze needs balance. Too much sweetness can make a dish feel heavy, while too much salt or spice can overpower the other flavors.
- The honey in this recipe adds sweetness and helps create the sticky texture that makes glazed chicken so enjoyable. The soy sauce brings saltiness and umami, creating a deep savory base.
- Sesame oil adds a nutty aroma that makes the sauce taste richer, while garlic and ginger add warmth and freshness. Chili crunch brings gentle heat along with texture, creating a slow-building spice that works perfectly with the sweetness of honey.
- The result is a glaze that is bold, balanced, and full of flavor.
Preparing the Chicken Before Cooking
- A little preparation makes a big difference with this recipe.
- Before cooking, I like to let the chicken thighs sit at room temperature for around 10 minutes. This helps them cook more evenly once they reach the hot pan.
- After removing any extra moisture with a paper towel, season both sides lightly with salt and pepper. Drying the chicken is an important step because excess moisture can prevent the outside from becoming crisp during searing.
- Once seasoned, the chicken is ready for the cornstarch coating.
- Spread the cornstarch on a plate and press each chicken thigh into it, making sure both sides are lightly covered. The coating should be thin and even. After coating, gently shake off any excess.
- A light coating is all that is needed to create the crispy exterior.
Making the Flavorful Honey Glaze
- While the chicken rests, the glaze comes together quickly.
- In a small bowl, combine low-sodium soy sauce, honey, sesame oil, chili crunch, minced garlic, and grated ginger. Whisk everything together until the ingredients are fully combined.
- Preparing the glaze before cooking makes the process smoother because the chicken cooks quickly once it reaches the pan. Having the sauce ready means the chicken can develop a perfect sear without rushing.
- The garlic and ginger add fresh flavor, while the chili crunch provides both heat and texture. The honey will later help the sauce become thick and glossy as it simmers.
Getting the Perfect Sear
- A hot pan is essential for this recipe. A stainless steel or cast iron pan works especially well because it holds heat and helps create a beautiful golden crust.
- Heat the pan over medium-high heat, then add olive oil or another cooking oil.
- Once the oil is hot, place the chicken thighs into the pan. Avoid moving them around too much because allowing them to cook undisturbed helps the crust develop.
- Sear the first side for about 3 to 4 minutes. When the chicken is ready to flip, the surface should look golden and crisp.
- Turn the chicken over and cook the other side for another 3 to 4 minutes until the chicken is cooked through and beautifully browned.
- The goal is to build flavor during this step. The browned pieces left in the pan will later add extra richness to the glaze.
Turning the Pan Into a Sticky Glaze Sauce
- Once the chicken is cooked, remove it from the pan and set it aside briefly.
- Lower the heat to medium-low before adding the glaze. This prevents the honey from cooking too quickly and allows the sauce to thicken slowly.
- Pour the prepared glaze into the same pan. As it begins to simmer, scrape the bottom gently to lift the flavorful browned bits left from the chicken.
- Those small pieces add extra depth and make the sauce taste richer.
- Allow the glaze to cook for about 3 minutes, stirring occasionally, until it becomes thicker and slightly glossy.
- This is the moment when simple ingredients transform into a rich coating sauce.
Coating the Chicken in the Glaze
- Return the chicken thighs to the pan once the glaze has thickened.
- Tilt the pan slightly so the sauce gathers, then spoon the glaze over the chicken pieces. Let the chicken warm through in the sauce for about 2 minutes.
- This final step allows the crispy coating to absorb some of the sweet and savory glaze while still keeping some of its texture.
- The sauce should cling to the chicken instead of running off, creating the signature sticky glazed finish.
- Remove the pan from the heat and finish the dish with sesame seeds and fresh chives.
- The sesame seeds add a little crunch, while the chives bring a fresh flavor that balances the richness of the sauce.
Serving Ideas for Honey Glazed Chicken
- This chicken is incredibly versatile and works with many different side dishes.
Serve It With Rice
- Steamed white rice is one of the easiest and best pairings. The rice absorbs the extra glaze, making every bite flavorful.
- You can also serve it with jasmine rice, brown rice, or another grain of your choice.
Pair It With Potatoes
- Roasted potatoes make a hearty side dish for this chicken. Their crispy edges and soft centers pair nicely with the sticky glaze.
- Mashed potatoes can also work if you want something comforting that soaks up the sauce.
Add Fresh Vegetables
- A simple salad or roasted vegetables can balance the richness of the chicken. Fresh greens, roasted broccoli, or seasonal vegetables all work well.
Helpful Tips for the Best Results
- Drying the chicken before coating helps the cornstarch stick properly and allows the chicken to brown instead of steam.
- Avoid overcrowding the pan because too much chicken at once can release moisture and prevent proper browning.
- Keep the cornstarch coating light. A thin layer creates the best texture and prevents the outside from becoming too thick.
- Watch the glaze carefully while simmering because honey contains natural sugars and can thicken quickly.
- Adjust the spice level according to your preference. The chili crunch gives a gentle heat, but it can easily be increased for a stronger kick.
Variations You Can Try
- For a spicier version, increase the chili crunch or add a pinch of red pepper flakes to the glaze.
- If you enjoy a stronger garlic flavor, add extra minced garlic and allow it to cook into the glaze for more depth.
- Maple syrup can replace honey if you want a slightly different sweetness with a deeper flavor.
- If chili crunch is unavailable, sambal oelek or sriracha can be used as alternatives. They will provide heat, although the texture will be slightly different.
Storing and Reheating Leftovers
This honey glazed chicken stores well, making it a great option for preparing meals ahead of time.
- Keep leftovers in an airtight container in the refrigerator for up to three days.
- To reheat, warm the chicken gently in a pan over medium-low heat with a small splash of water. This helps loosen the glaze and keeps the chicken moist.
- The microwave can also be used for reheating. Heat for about 45 to 60 seconds, but remember that the crispy coating may soften slightly.
- The flavors often become even richer after resting because the chicken continues absorbing the glaze.
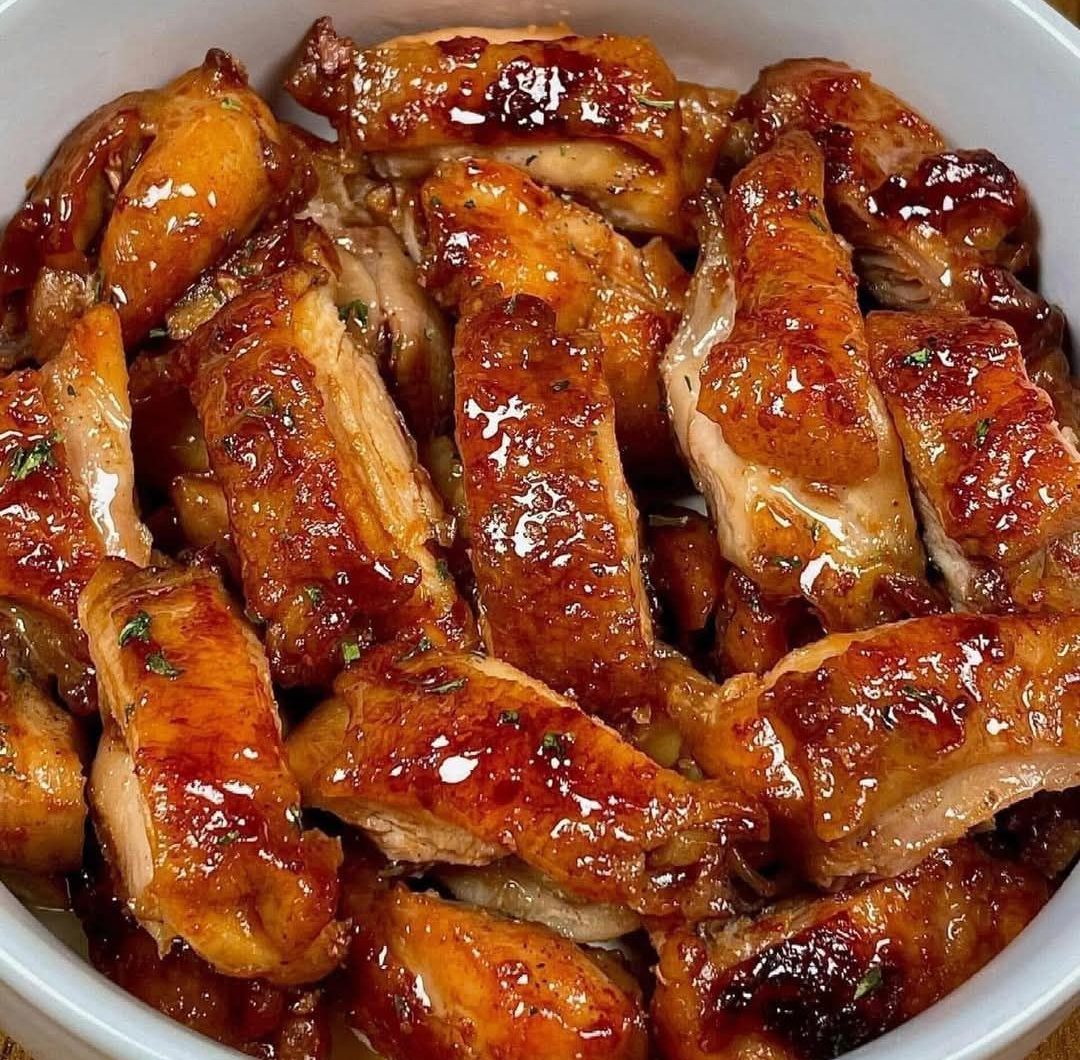
Healthy Honey Glazed Chicken
These Honey Glazed Chicken Thighs are crispy on the outside, juicy on the inside, and coated in a sticky sweet-and-savory glaze. The chicken is lightly coated with cornstarch and pan-seared until golden, then finished with a flavorful sauce made from soy sauce, honey, chili crunch, sesame oil, garlic, and ginger. The glaze thickens beautifully in the pan, creating a perfect balance of sweetness, spice, and savory flavor. This easy one-pan chicken recipe is perfect for serving with rice, potatoes, or a fresh salad.
4
servings30
minutes40
minutes300
kcalIngredients
1/4 cup olive oil, for frying the chicken
6 boneless, skinless chicken thighs
1/3 cup cornstarch
Salt and pepper, to taste1/4 cup low-sodium soy sauce
3 tablespoons honey
1 ½ teaspoons sesame oil
1 tablespoon chili crunch4 garlic cloves, minced
1 teaspoon fresh ginger root, minced
Sesame seeds, for garnish
Chives, for garnish
Directions
- Let the chicken thighs sit at room temperature for about 10 minutes. Pat them dry with a paper towel, then season both sides lightly with salt and pepper.
- Prepare the glaze by adding low-sodium soy sauce, honey, sesame oil, chili crunch, minced garlic, and grated ginger to a small bowl. Whisk until everything is well combined.
- Spread the cornstarch on a plate. Press each chicken thigh into the cornstarch, coating both sides evenly. Shake off any extra cornstarch so the coating stays light.
- Heat a large stainless steel or cast iron pan over medium-high heat. Add olive oil once the pan is hot.
Place the coated chicken thighs into the pan and cook for 3 to 4 minutes without moving them. This helps create a crisp golden crust. - lip the chicken thighs and cook for another 3 to 4 minutes until golden, crispy, and fully cooked.
Remove the chicken from the pan and set aside. Reduce the heat to medium-low.
Pour the prepared glaze into the same pan. Bring it to a gentle simmer while scraping the browned bits from the bottom of the pan - Cook the glaze for about 3 minutes, stirring occasionally, until it thickens and becomes glossy.
Return the chicken thighs to the pan. Spoon the glaze over the chicken and let it warm through for about 2 minutes until fully coated.
Remove from heat and garnish with sesame seeds and fresh chives
Notes
- If using regular full-sodium soy sauce instead of low-sodium soy sauce, reduce or skip the added salt on the chicken to prevent the dish from becoming too salty.
- Keep the cornstarch coating light for the best crispy texture. Too much coating can make the chicken heavy.
- Do not overcrowd the pan while searing, as this can prevent the chicken from developing a golden crust.
- Chicken breasts can be used instead of chicken thighs, but they cook faster and can dry out more easily. Cook until the internal temperature reaches 165°F.
- For extra heat, increase the chili crunch or add red pepper flakes to the glaze.
Leftovers can be stored in an airtight container in the refrigerator for up to 3 days. Reheat gently in a pan with a small splash of water or warm in the microwave
Nutrition Facts
- Serving Size: 4 g
- Total number of serves: 4
- Calories: 300kcal
- Fat: 5g
- Saturated Fat: 6g
- Sodium: 236mg
- Potassium: 45mg
- Carbohydrates: 12g
- Fiber: 521g
- Protein: 625g
